
.jpg)
 8 months ago
83
8 months ago
83
PROTECT YOUR DNA WITH QUANTUM TECHNOLOGY
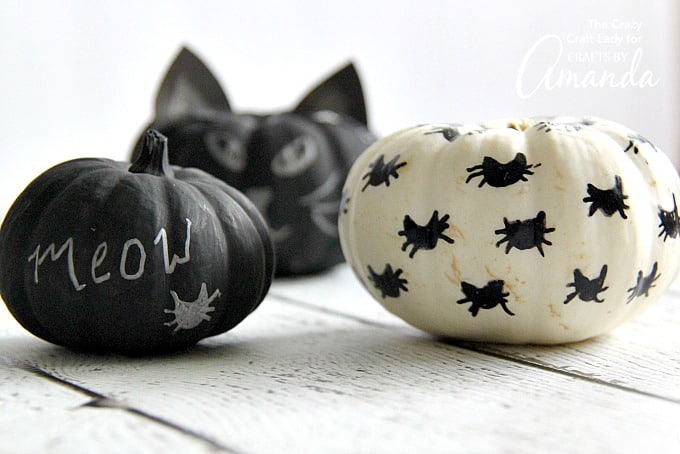
Orgo-Life the new way to the future Advertising by AdpathwayWe love this spooky and adorable black cat pumpkin project! Use different shaped pumpkins to get a variety of black kitties for your porch.

Why this project works
There’s not much carving involved for these cute black cat pumpkins, just for cutting out the eyes. You could add a mouth or a nose if you like as well.
Very few supplies are needed to make your cat pumpkin, making it a fun, quick project and a festive way to decorate your stoop. It’s also a good idea to hang on to if you plan on hosting a pumpkin painting party.

Helpful Project Information:
- Age Level: 7 and up
- Mess Factor: Medium (spray paint)
- Level of Difficulty: Medium (carving)
- Time to Complete: less than 60 minutes
- Cost Estimate: Less than $6.00 each
Craft supplies you will need
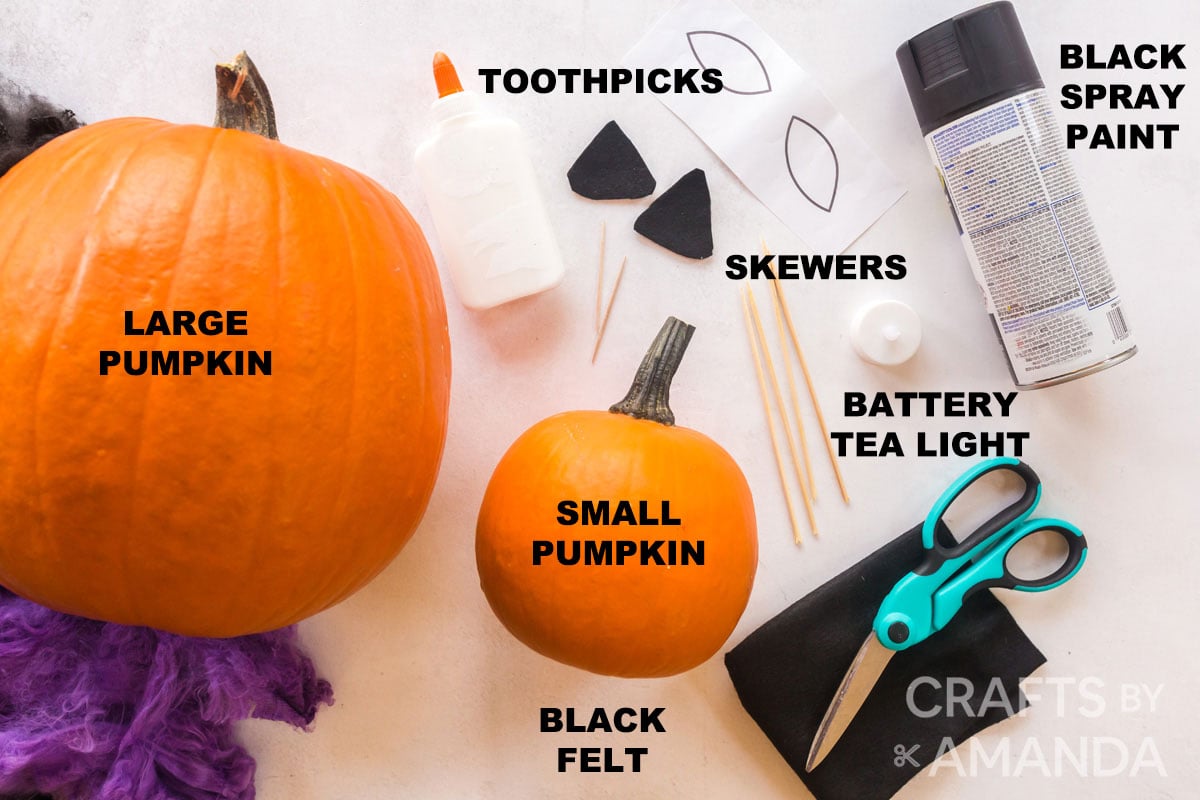 Get full list of supplies and directions in the printable version at the end of this post.
How to Make Black Cat Pumpkins
These step by step photos and instructions are here to help you visualize how to make this project. Please scroll down to simply print out the instructions!
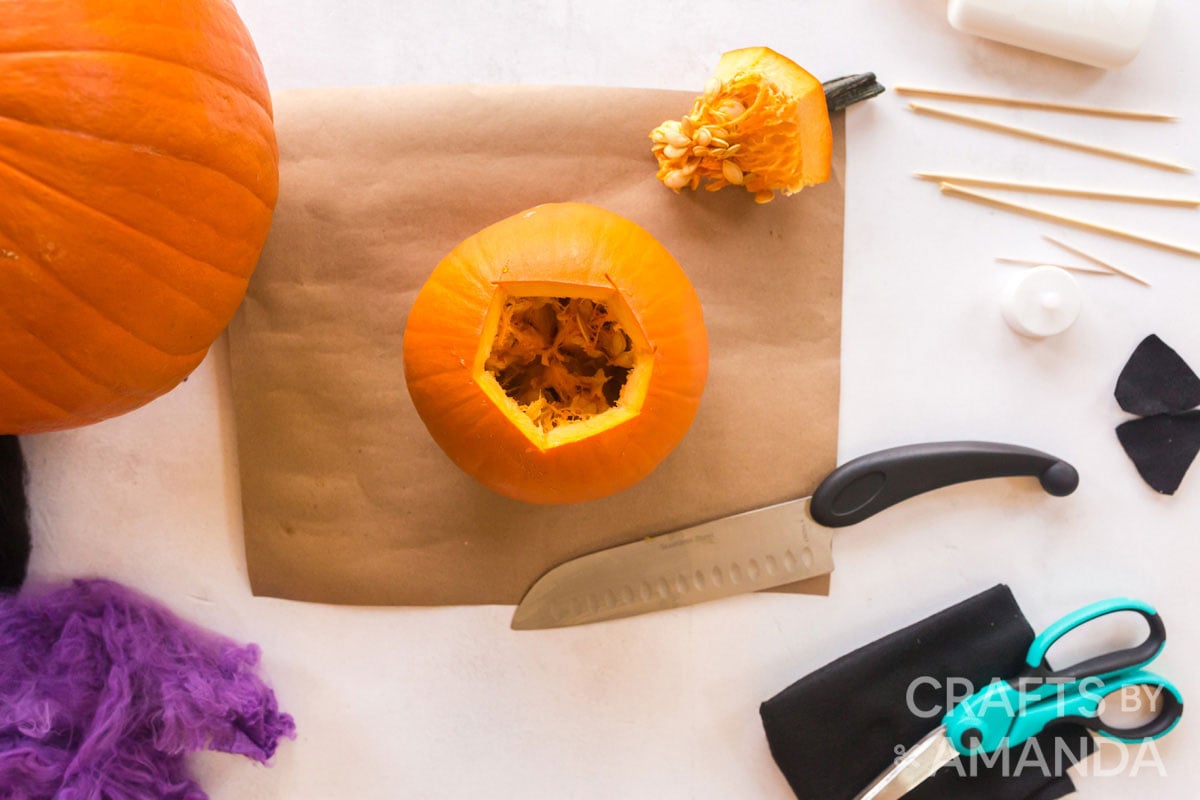
- Cut off the top of the small pumpkin and clean out all the seeds and guts. Make my roasted pumpkin seeds when you’re done!
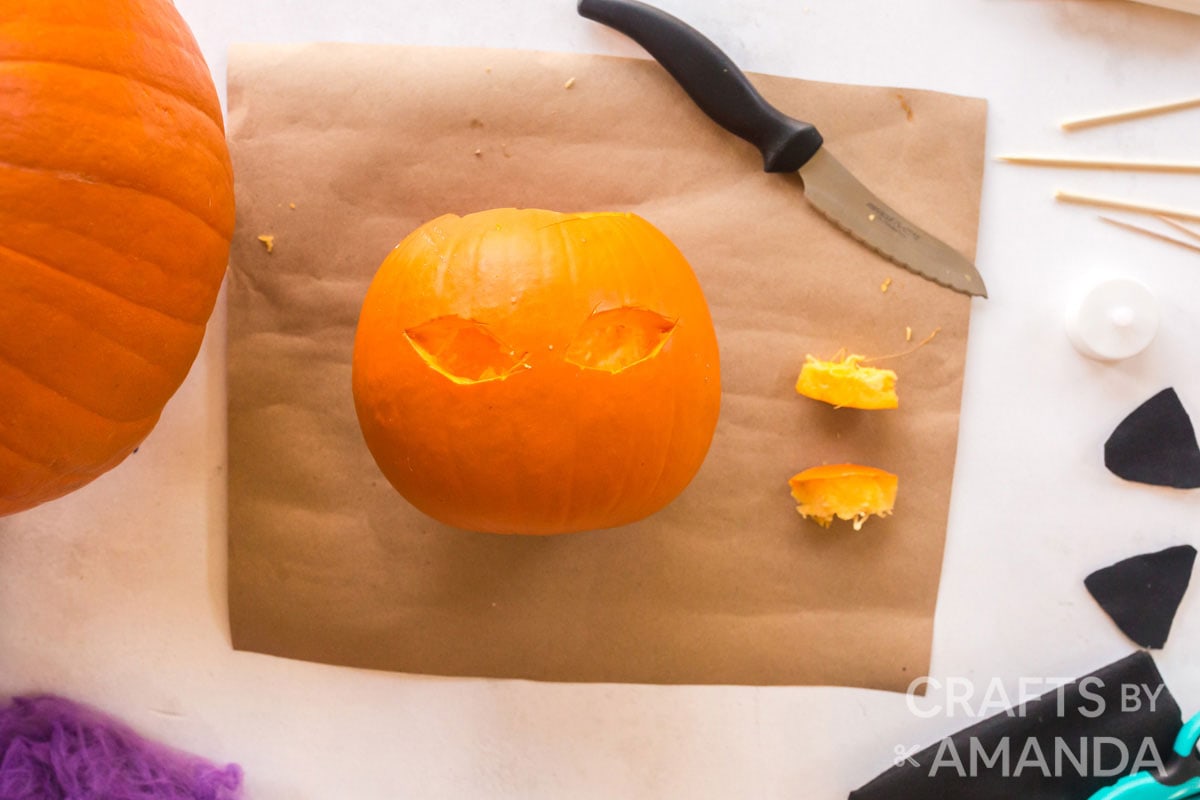
- Draw two almond-shaped eyes on paper to fit the small pumpkin then tape or pin it to the front of the pumpkin. Carve eyes out.
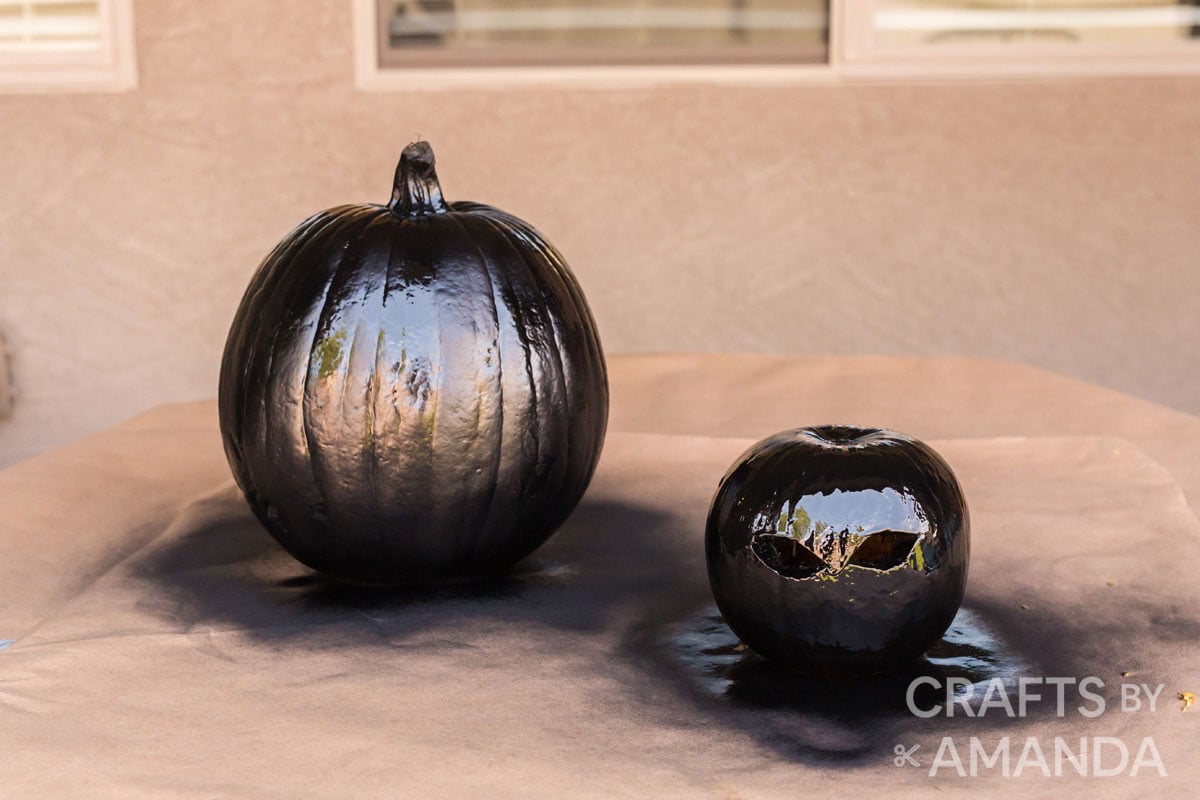
- Lay newspapers or other drop cloth material outside and place pumpkins on top.
- Spray paint both pumpkins black and allow to dry completely.
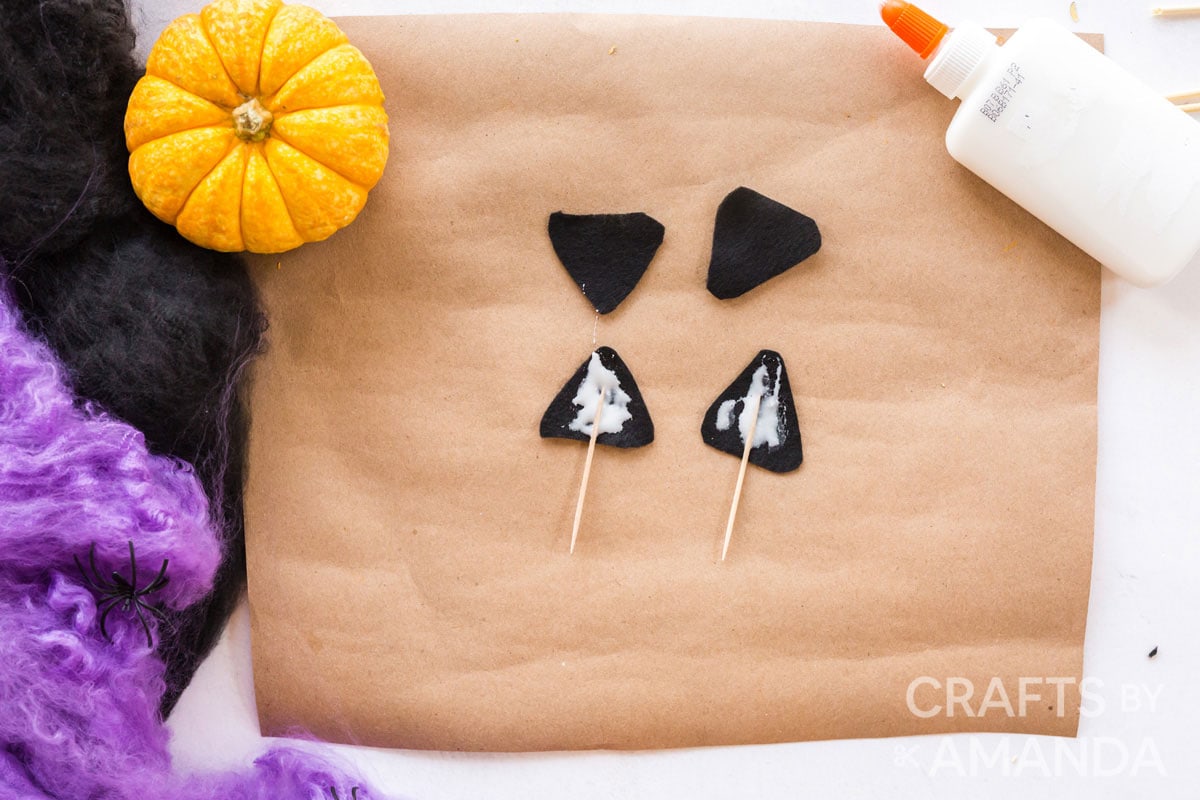
- Use black felt or craft foam to make simple triangle shaped ears. Use two layers for each ear. Glue a toothpick in between the two layers.
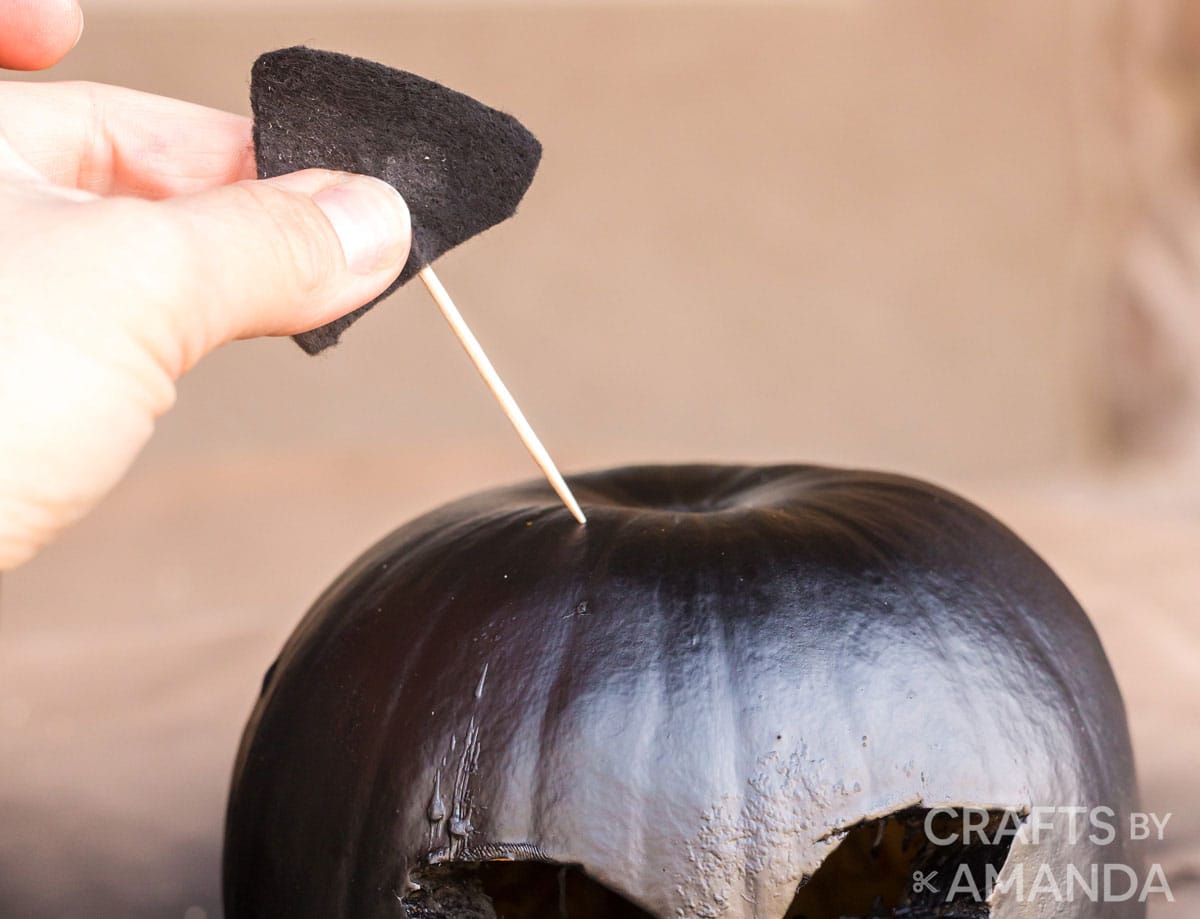
- Turn the small pumpkin upside down, bottom side up. Poke the toothpicks through the bottom of the little pumpkin.
- Place a tea light on top of the large pumpkin (body). If necessary, trim the stem so the tea light can rest without falling.
- Use sturdy wooden skewers to attach the two pumpkins together.


Expert Crafting Tips
- Battery operated tea lights are safer, but you can use regular tea light candles if you prefer.
- Want a tail? Find a long zucchini or cucumber and paint it black!
We love it when we find simple pumpkin decorating ideas. We know you’ll love this cute and spooky black cat pumpkin for your front door!
More Halloween Crafts
- Pumpkin Painting Party
- Decomesh Pumpkin Wreath
- 3D Paper Pumpkin
- Mason Jar Lid Pumpkins
- Halloween Terrarium
- You’ve Been Booed
 Were you looking for a different cat pumpkin project? You may have seen this one here before!
I love to create and share my projects with you! I know it’s hard to remember to come back and search, so I’ve made it easy for you with my weekly newsletter! You can subscribe for free and I’ll send you fun crafts and delicious recipes every week right to your email.
Black Cat Pumpkin
Learn how to make an adorable black cat from two pumpkins and a little spray paint. Bonus – includes glowing eyes!
Prep Time10 minutes
Crafting Time30 minutes
Dry time20 minutes
Total Time1 hour
Author: Amanda Formaro
Supplies
- Large pumpkin
- Small pumpkin
- Black spray paint
- Black felt or craft foam
- 2 toothpicks
- 2 sturdy wooden skewers
- Battery operated tea light
Craft tools
Craft glue or hot glue
Instructions
Draw two almond shaped eyes on paper to fit the small pumpkin and tape or pin to the front of the pumpkin. Carve eyes out.
Lay newspapers or other drop cloth material outside and place pumpkins on top.
Spray paint both pumpkins black and allow to dry completely.
Use black felt or craft foam to make simple triangle shaped ears. Use two layers for each ear. Glue a toothpick in between the two layers.
Turn the small pumpkin upside down, bottom side up. Poke the toothpicks through the bottom of the little pumpkin.
Place a tea light on top of the large pumpkin (body). If necessary, trim the stem so the tea light can rest without falling.
Use sturdy wooden skewers to attach the two pumpkins together.
Expert Tips & FAQs
- Battery operated tea lights are safer, but you can use regular tea light candles if you prefer.
- Want a tail? Find a long zucchini or cucumber and paint it black!
This post originally appeared here on Oct 6, 2017 but has since been altered with new instructions and photos.

Aimee is a twin mom, lawyer, and creativity junkie.She is dedicated to helping busy women and their families live more creative and inspired lives by sharing simple crafts, decor, recipes, and organizing solutions on her blog, The Crazy Craft Lady.
Latest posts by Aimee Page (see all)


 English (US) ·