
.jpg)
 6 months ago
86
6 months ago
86
PROTECT YOUR DNA WITH QUANTUM TECHNOLOGY
Orgo-Life the new way to the future Advertising by AdpathwayAuthor by Amanda Davis on October 7, 2025 Updated on October 7, 2025
This five minute project is super easy for most age groups. While these are flame candles, parental supervision is highly recommended.
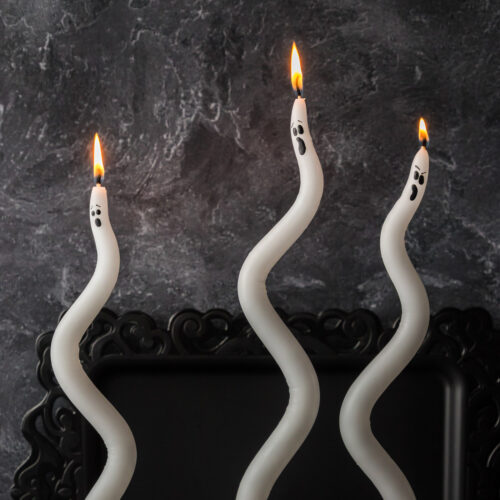
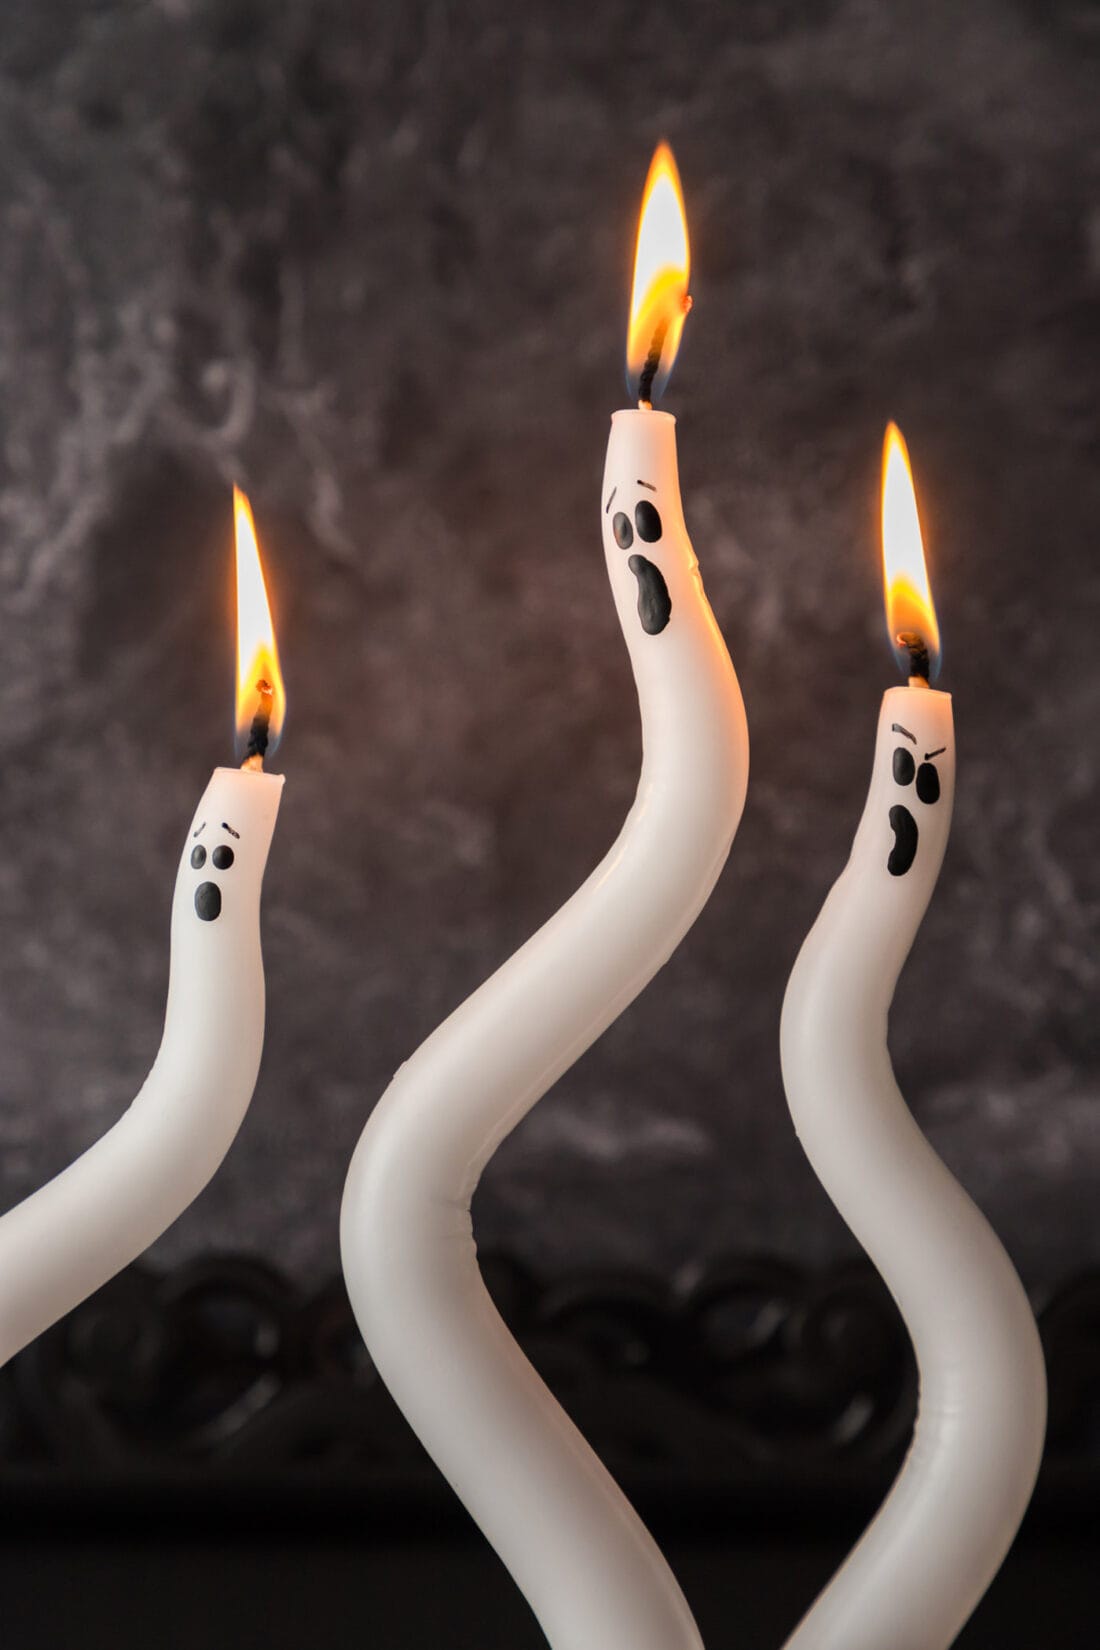
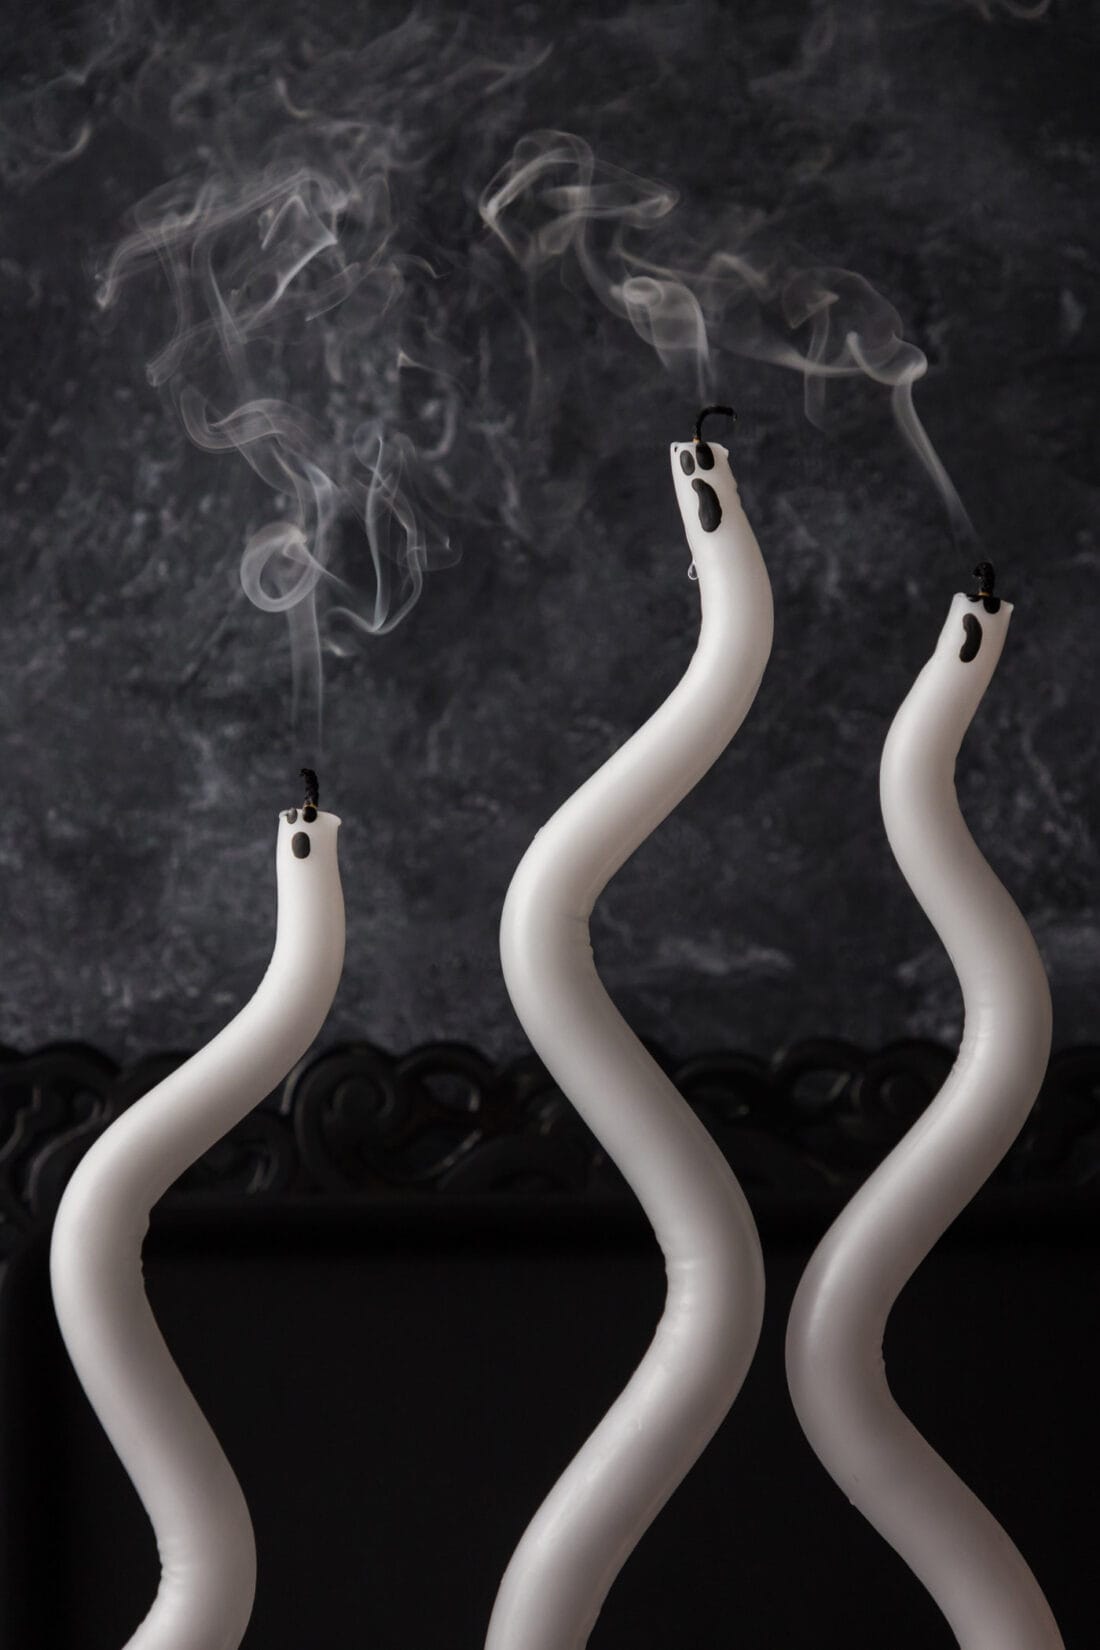
Spooky, fun ghost candles are the perfect Halloween decoration! When the candle burns down past the face, blow them out and add fresh ones!
Why we love this project
This five minute project is super easy for most age groups and makes a great decoration for your Halloween party or pumpkin painting party table! Because these are flame candles, parental supervision is highly recommended.
Helpful Project Information:
- Mess Factor: Medium
- Level of Difficulty: Easy
- Time to Complete: Less than 30 minutes
- Cost Estimate: Less than $10.00
Craft supplies you will need
Get full list of supplies and directions in the printable version at the end of this post.
How to Make Ghost Candles
These step by step photos and instructions are here to help you visualize how to make this project. Please scroll down to simply print out the instructions!
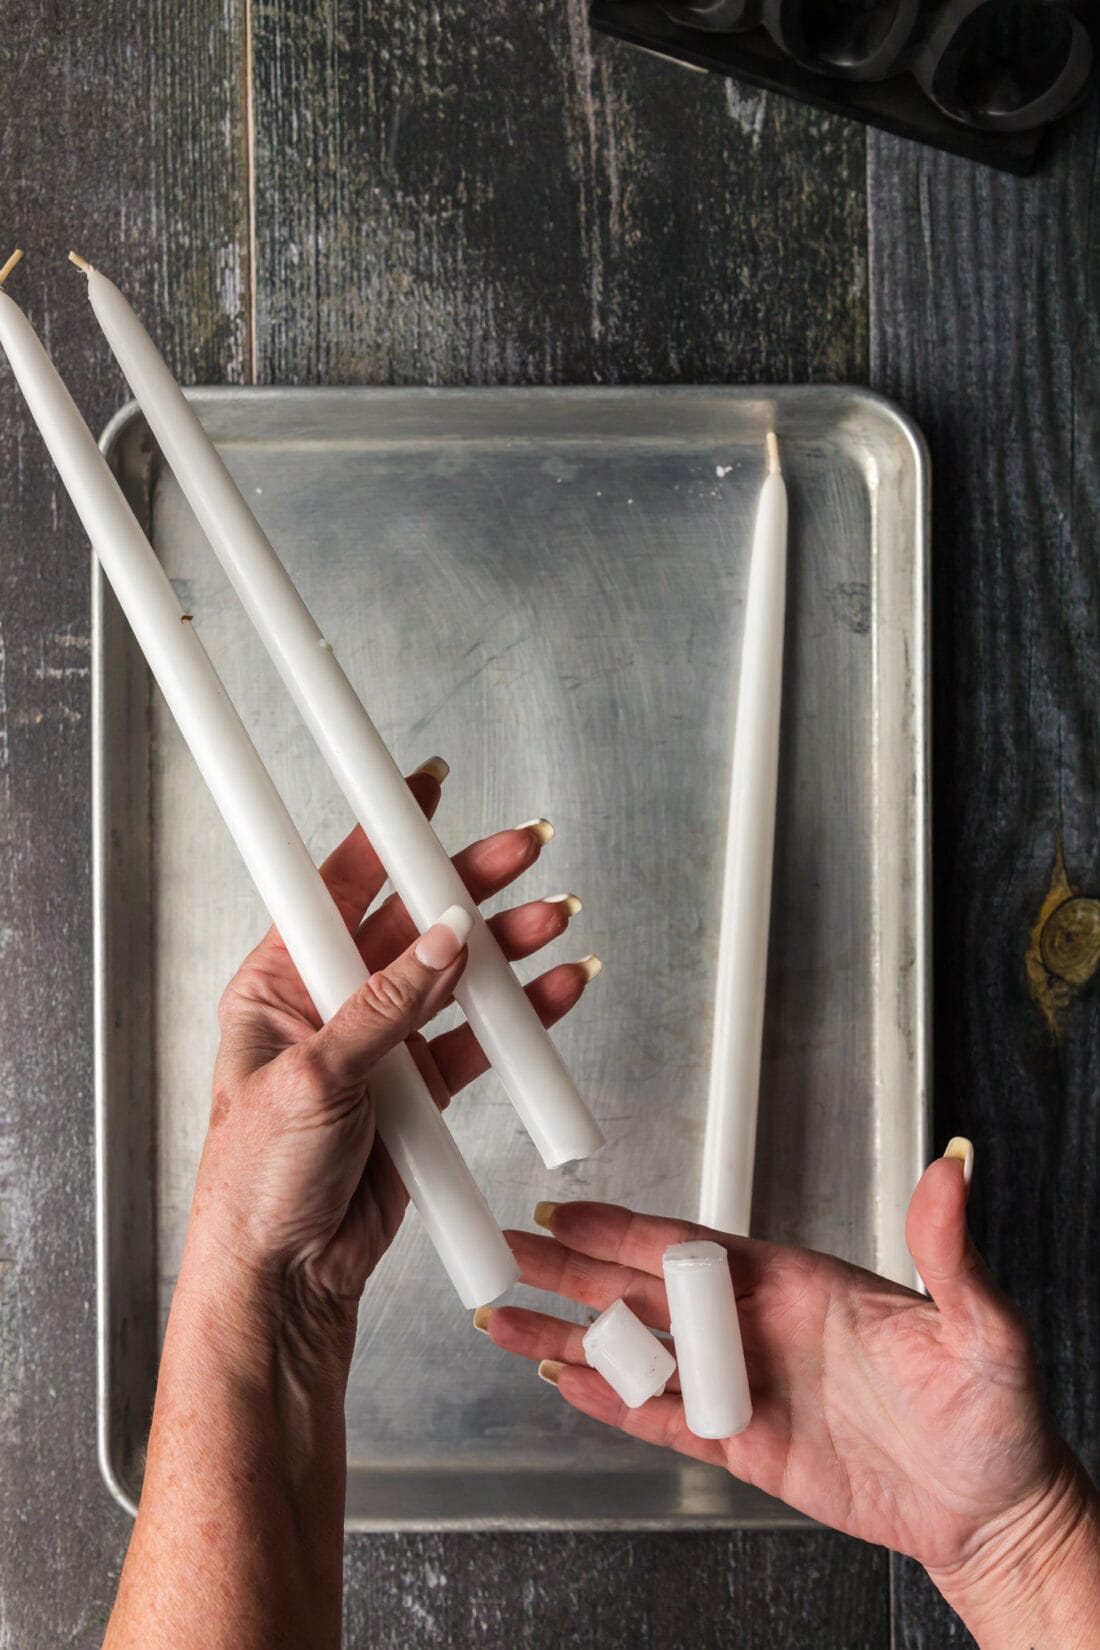
- Remove candles from plastic packaging, if any.
- This step is optional, but if you want your candles to be different heights, cut some off the bottom of the candle.
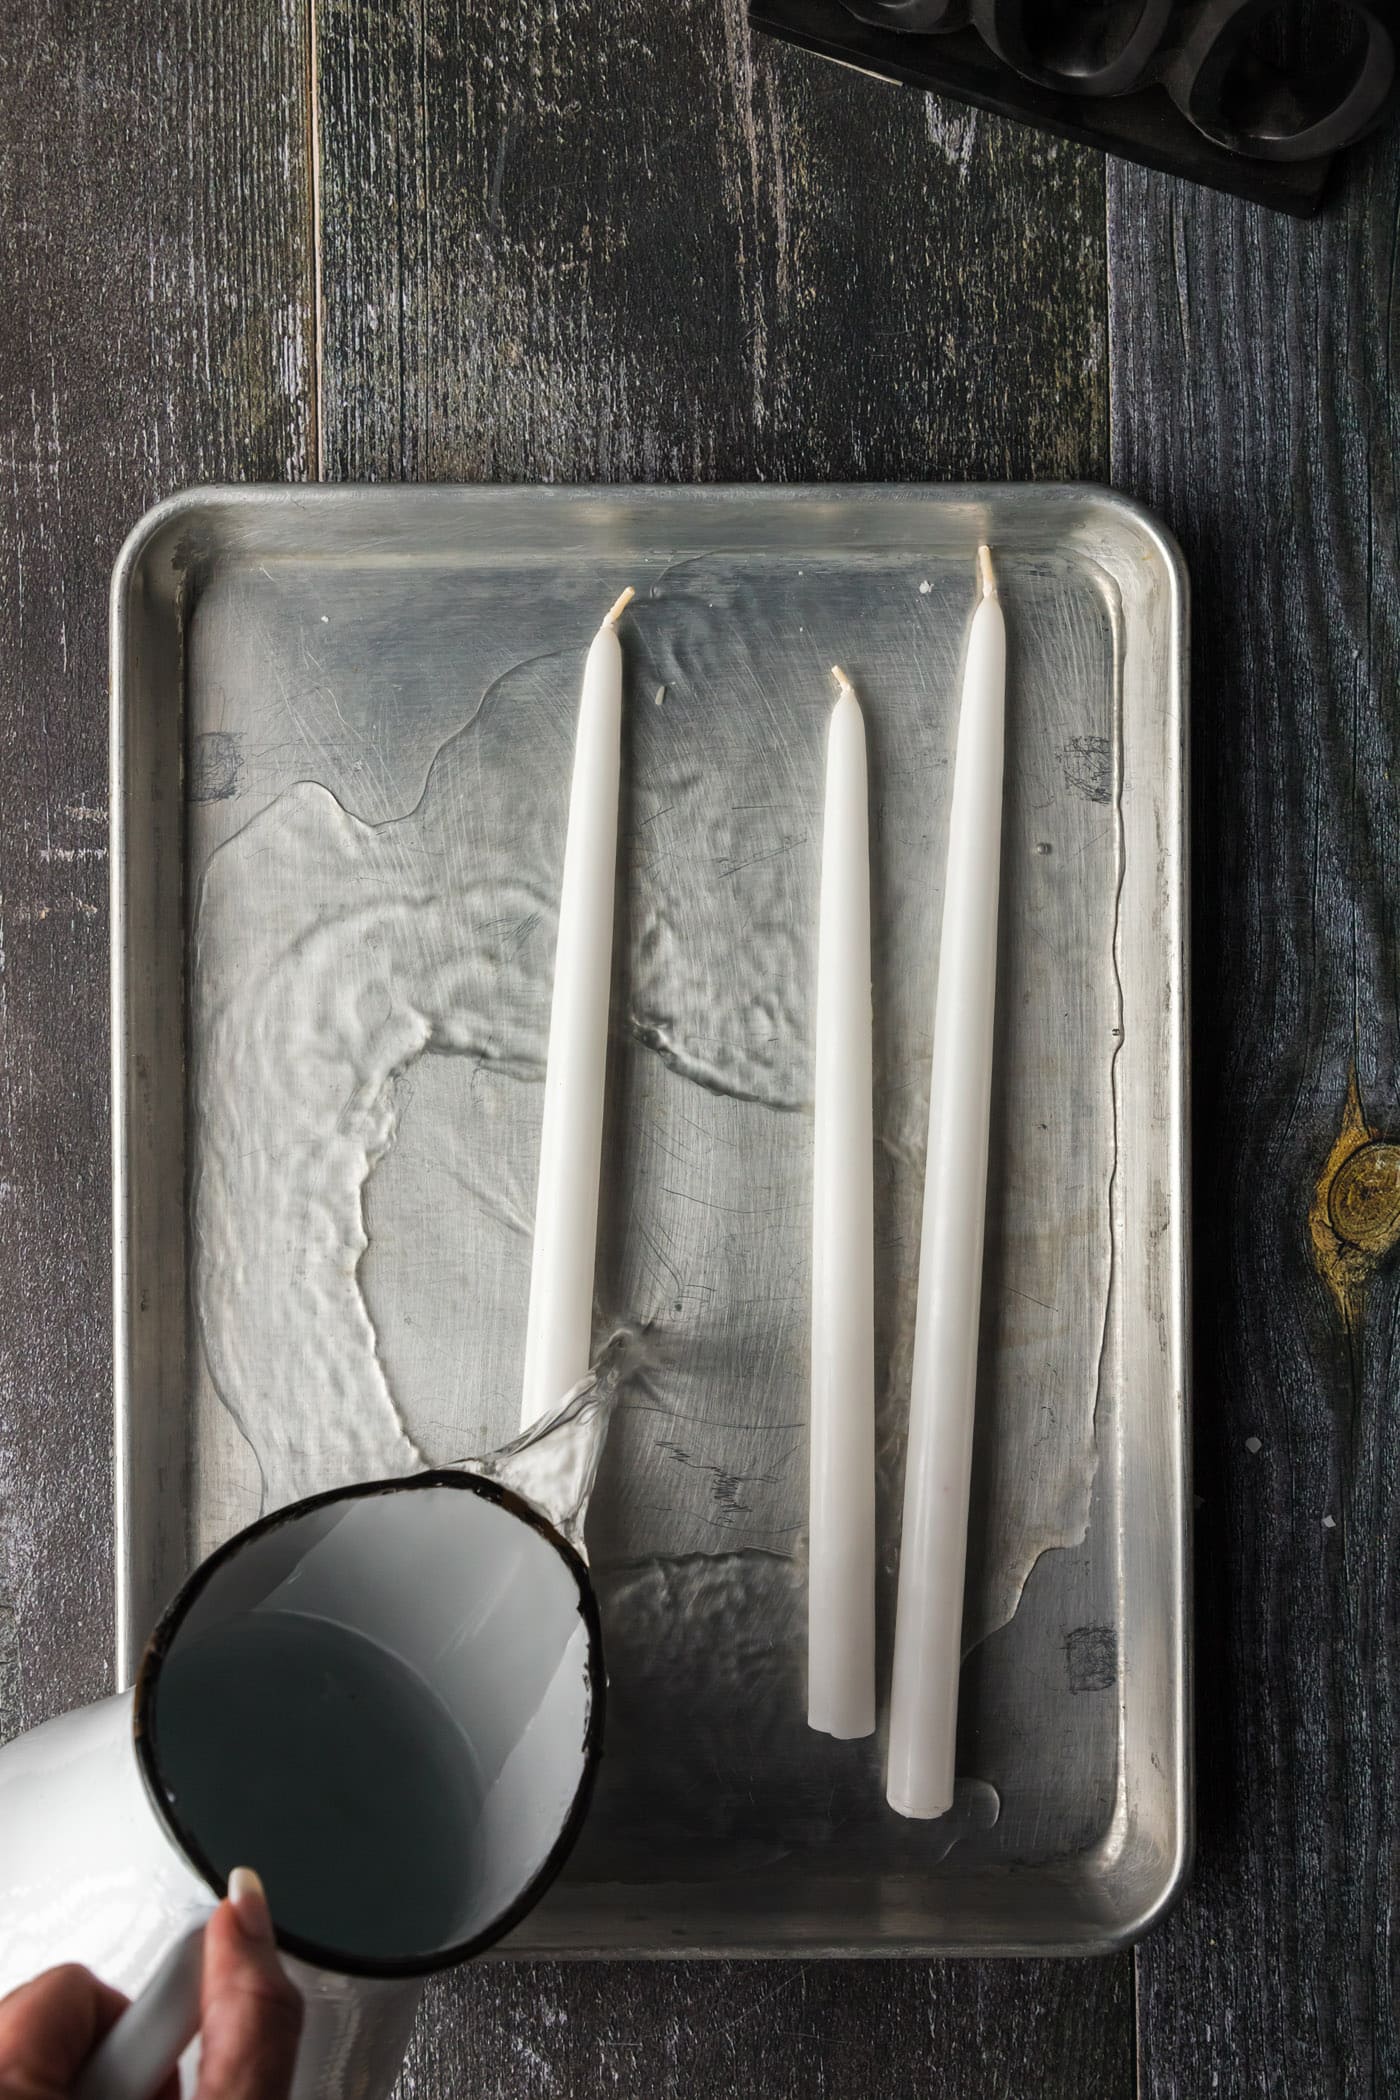
- Place candles in a large baking sheet with sides (we used a jelly roll pan).
- Turn tap water on hot and let it run. When it reaches the hottest temp, fill a pitcher with it.
- Carefully pour the hot water into the jelly roll pan.

- Set a timer for 5 minutes.
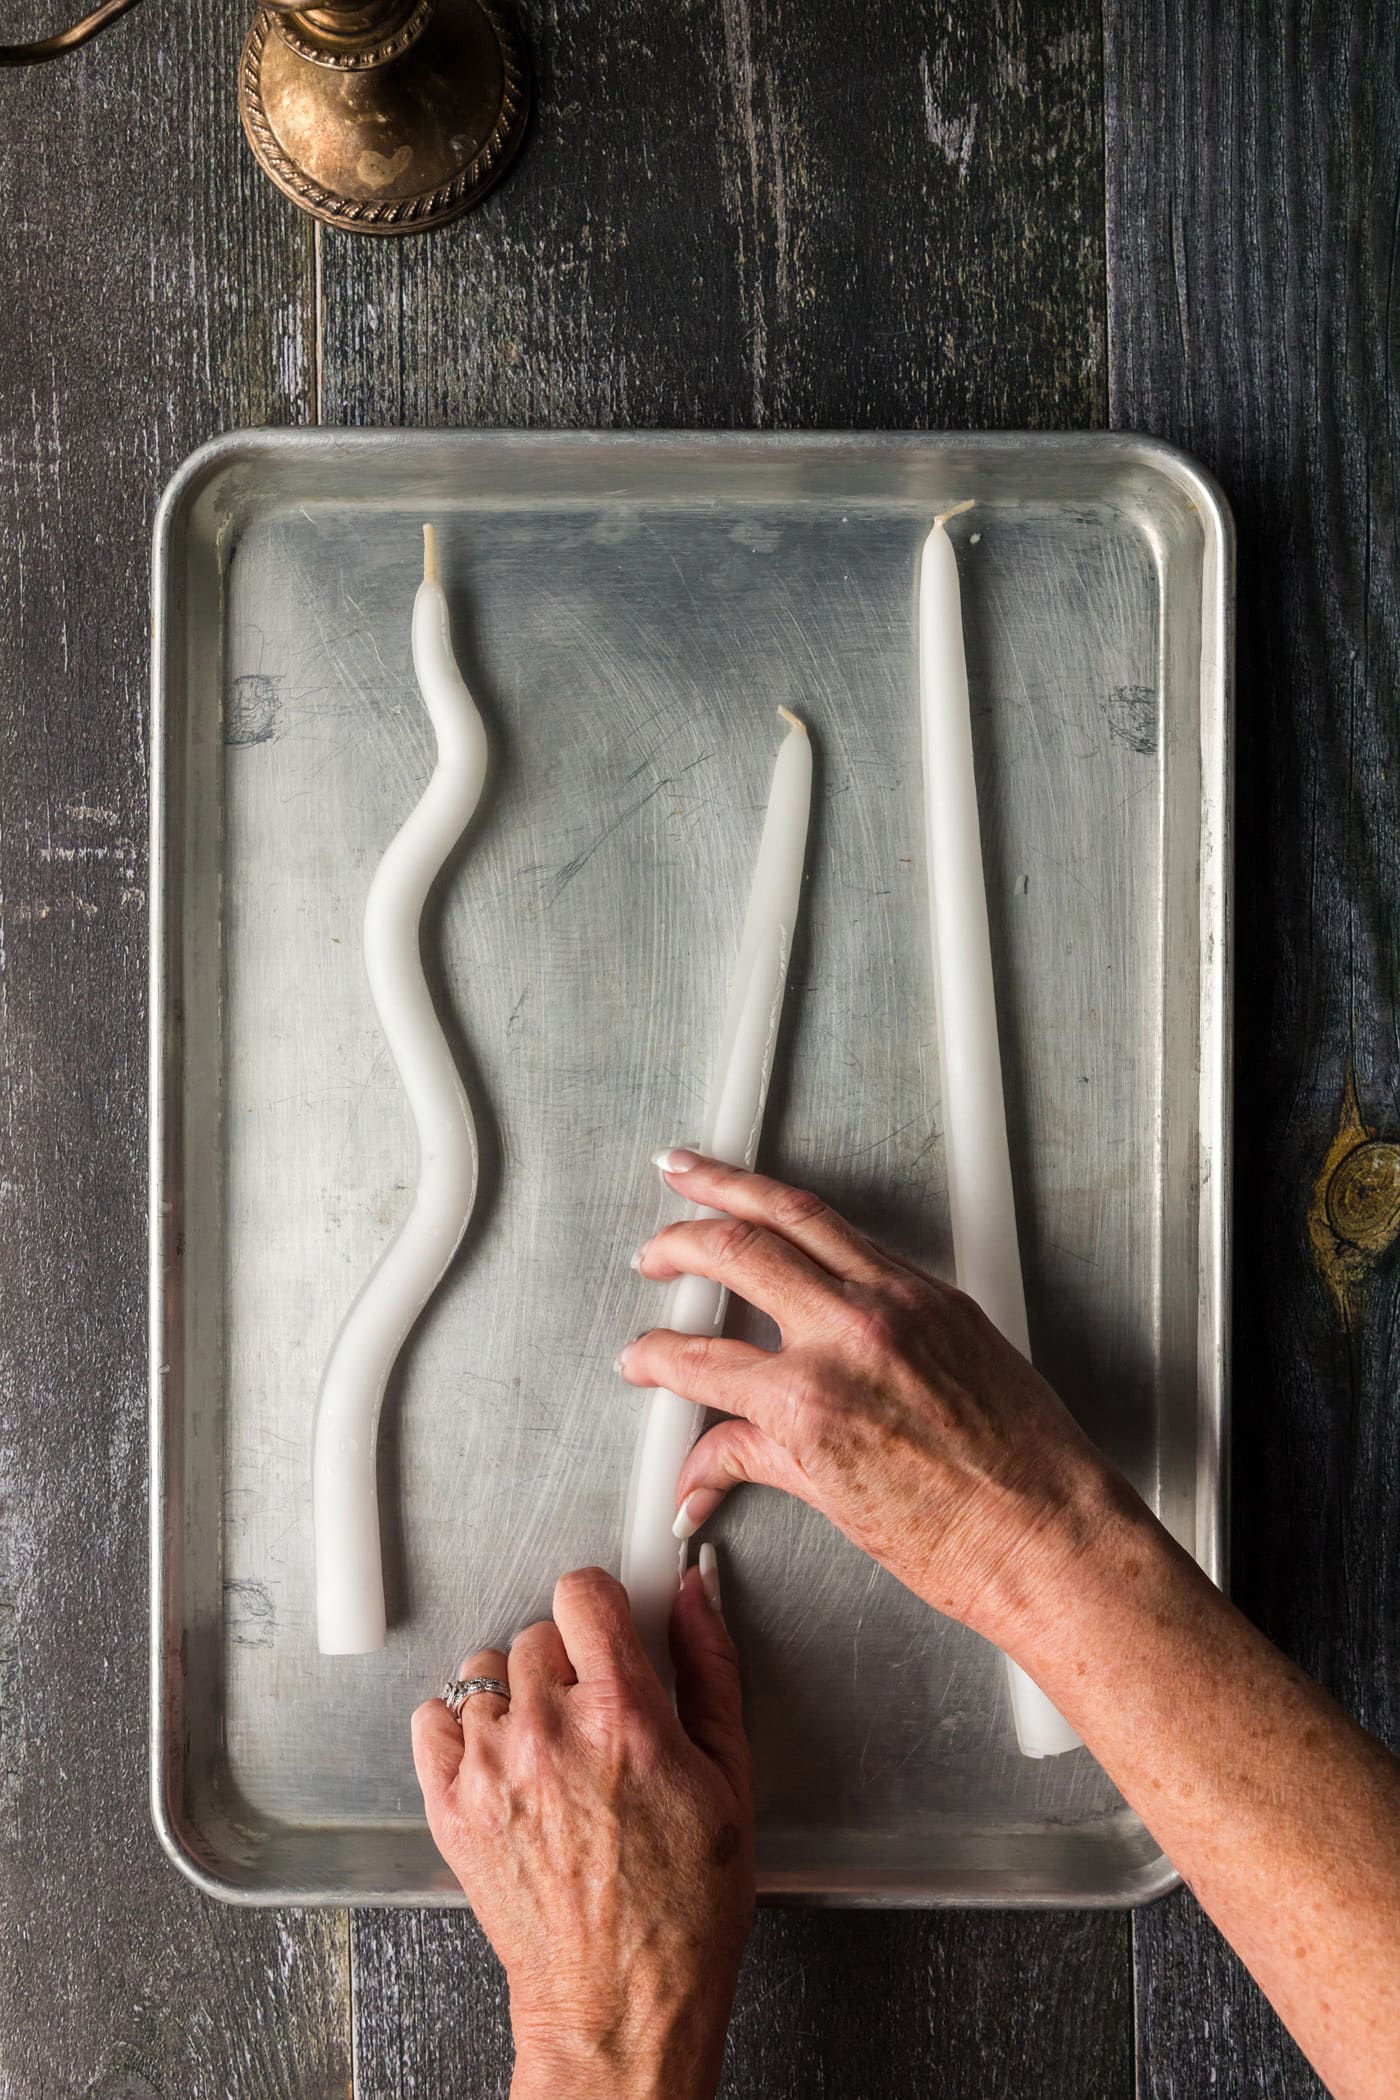
- Carefully bend candles into desired curved shapes.
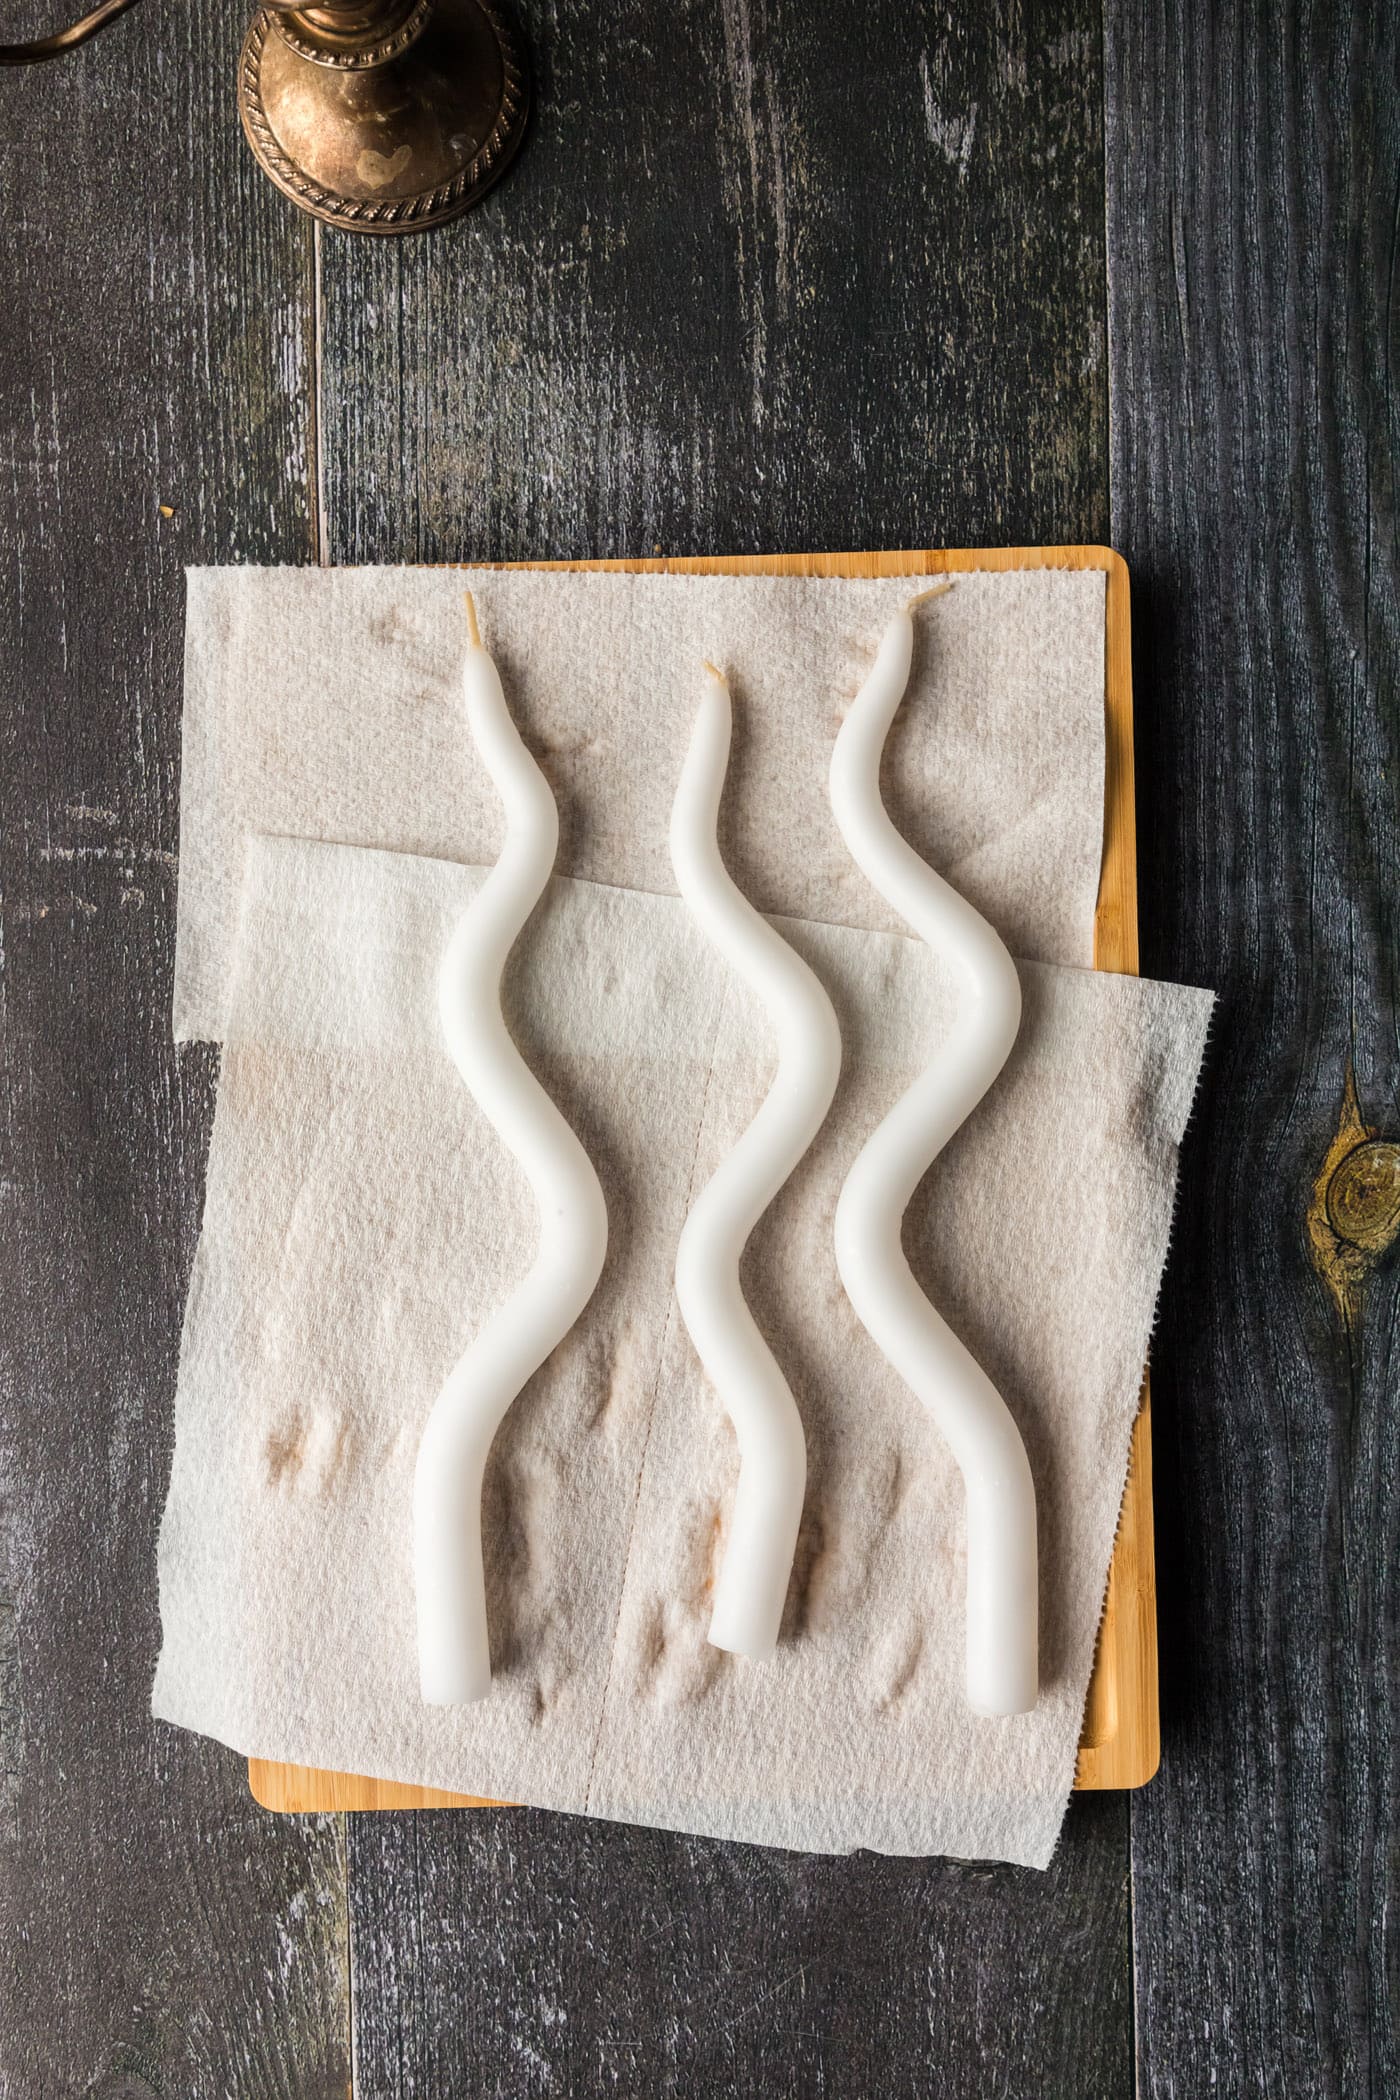
- Remove from hot water and place on paper towels. Let cool.
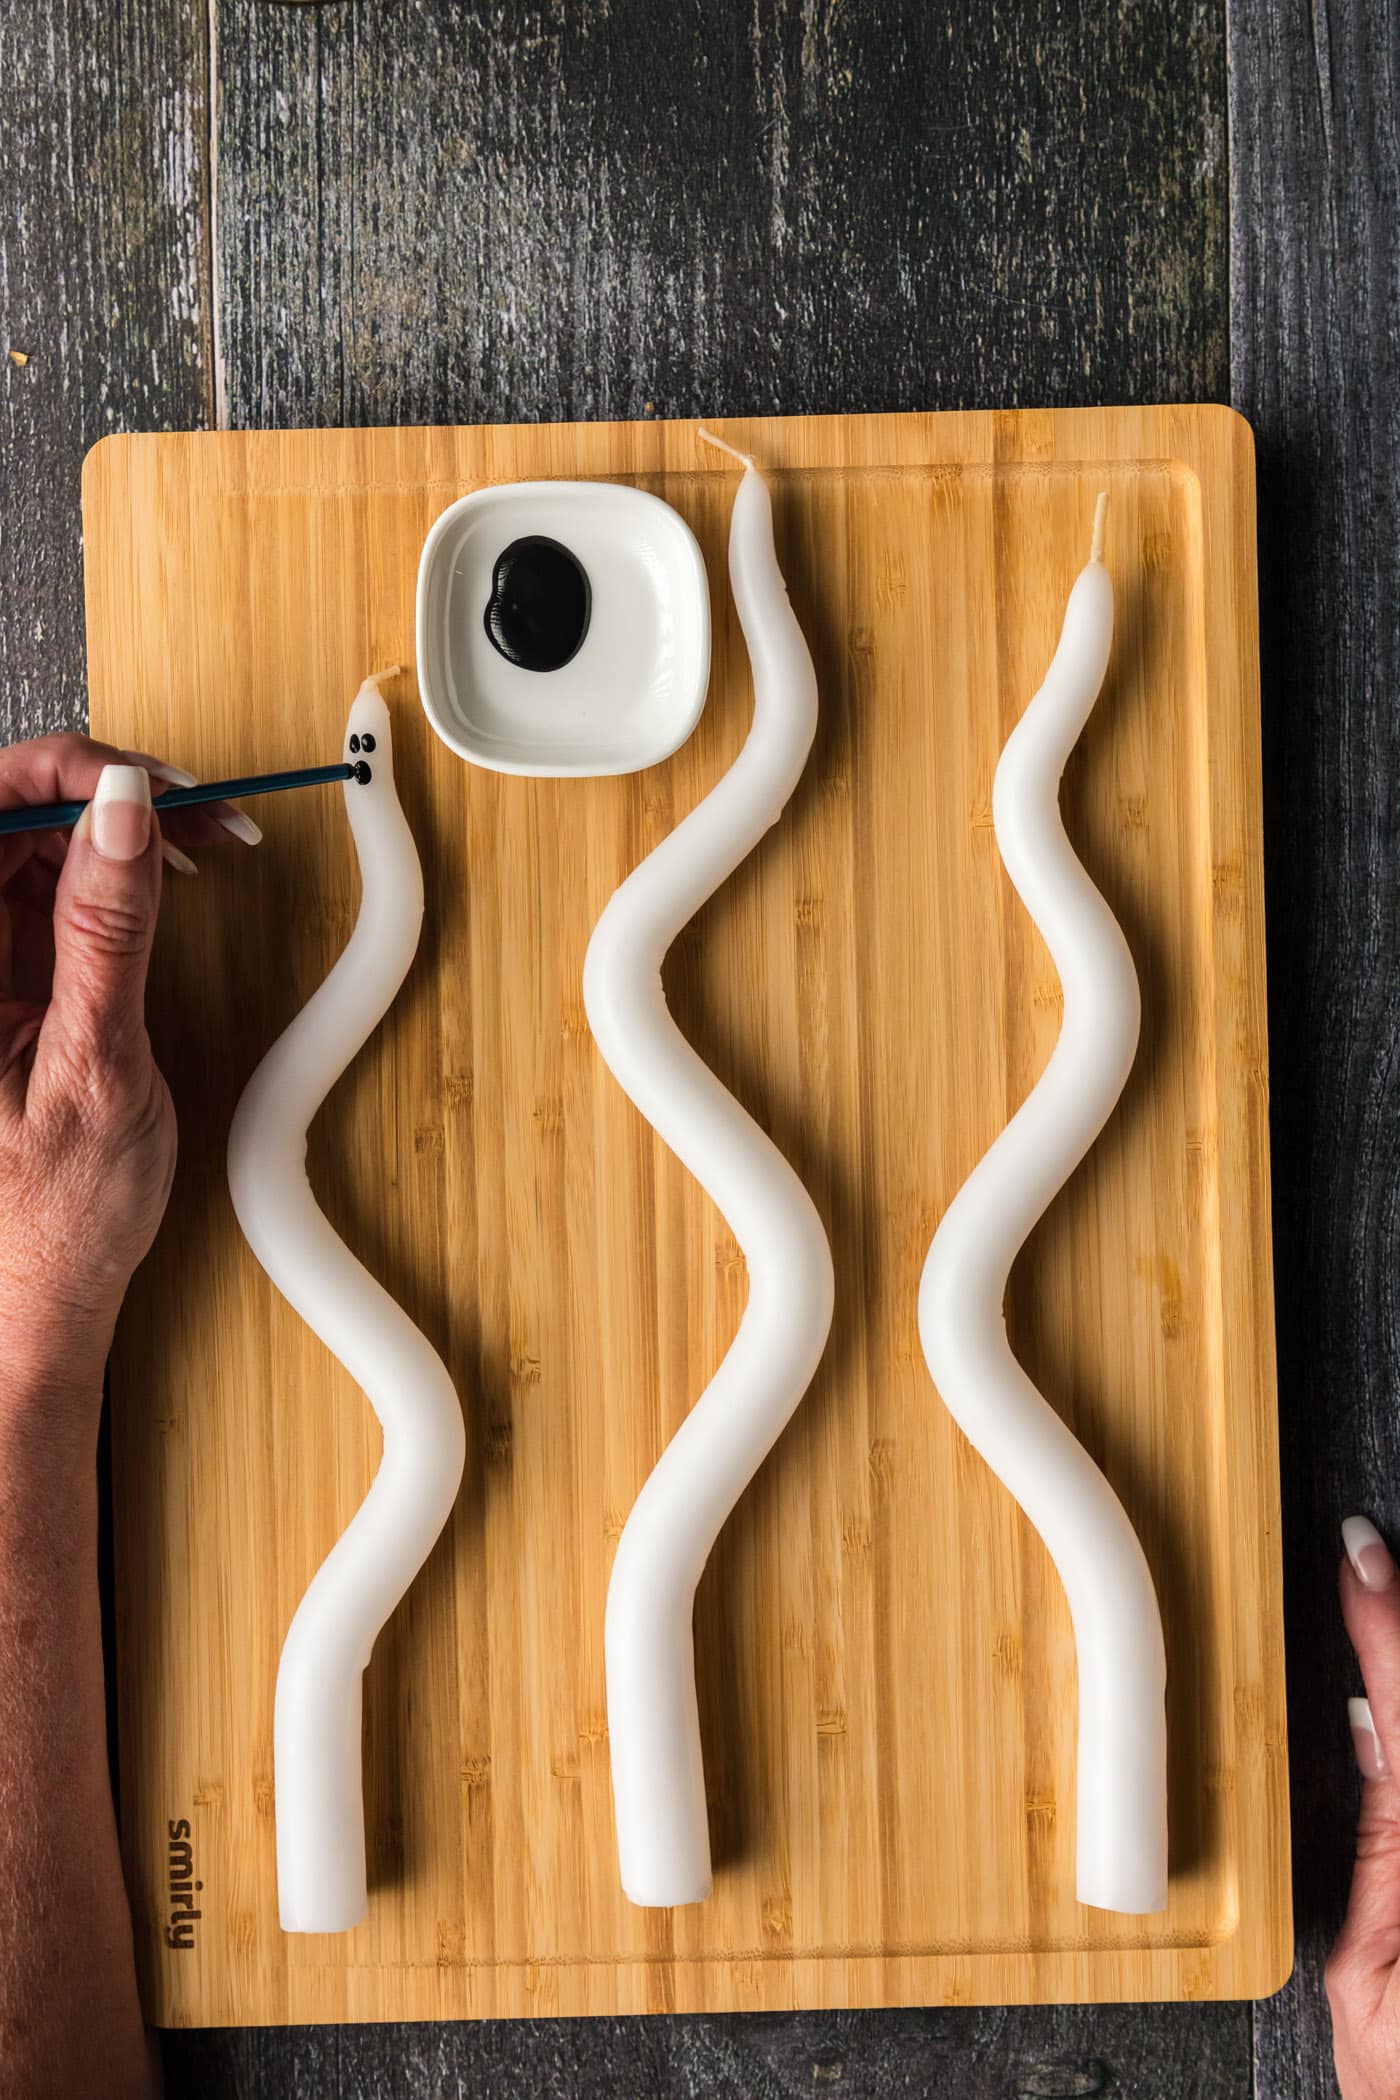
- Use the handle end of a paintbrush dipped in black acrylic paint to dot on eyes and mouths. Use a black marker to add eyebrows.
Expert Crafting Tips
You will have a minute or so after taking the candles out of the water to still manipulate the shape. Don’t try to bend them after they cool or you could break the candles.
We used taper candles we found at Hobby Lobby. Please note that different types of candles may need more time in the hot water. If so, change out the water every 5 minutes until you can bend them.
This project was inspired by a video we saw on the Instagram account @kailochic.
More Halloween Crafts
I love to create and share my projects with you! I know it’s hard to remember to come back and search, so I’ve made it easy for you with my weekly newsletter! You can subscribe for free and I’ll send you fun crafts and delicious recipes every week right to your email.
Ghost Candles
This five minute project is super easy for most age groups. While these are flame candles, parental supervision is highly recommended.
Crafting Time5 minutes
Total Time5 minutes
Age Group: Adult Crafts, Kids Crafts
Project Type: Halloween
Makes: 3 candles
Supplies
- 3 white taper candles
- hot tap water hottest it will go
- black acrylic craft paint
- small paint brush or toothpick
- Black Sharpie
Craft tools
1 jelly roll pan
1 pitcher or cup
Instructions
Remove candles from plastic packaging, if any.
This step is optional, but if you want your candles to be different heights, cut some off of the bottom of the candle.
Place candles in a large baking sheet with sides (we used a jelly roll pan).
Turn tap water on hot and let it run. When it reaches the hottest temp, fill a pitcher with it. Carefully pour the hot water into the jelly roll pan.
Set timer for 5 minutes.
Carefully bend candles into desired curved shapes.
Remove from hot water and place on paper towels. Let cool.
Use the handle end of a paintbrush dipped in black paint to dot on eyes and mouths. Use a black marker to add eyebrows.
Expert Tips & FAQs
- You will have a minute or so after taking the candles out of the water to still manipulate the shape. Don’t try to bend them after they cool or you could break the candles.
- We used taper candles we found at Hobby Lobby. Please note that different types of candles may need more time in the hot water. If so, change out the water every 5 minutes until you can bend them.
- When candles burn down past the faces, blow the candles out and add new faces!
This post originally appeared here on Oct 9, 2023.
Amanda Davis is the crafty, entrepreneurial mother of four children. She loves to bake, cook, make kid's crafts and create decorative items for her home. She is a crafting expert and guru in the kitchen and has appeared online and in print publications many times over the years.
Latest posts by Amanda Davis (see all)
Reader Interactions
Free CraftsBy email every week
Latest crafts straight to your inbox!


 English (US) ·