
.jpg)
 8 months ago
94
8 months ago
94
PROTECT YOUR DNA WITH QUANTUM TECHNOLOGY
Orgo-Life the new way to the future Advertising by AdpathwayAuthor by Jane and Sonja on October 3, 2025 Updated on October 3, 2025
Create an easy and beautiful Halloween Ribbon Wreath in traditional holiday colors with this simple tutorial!
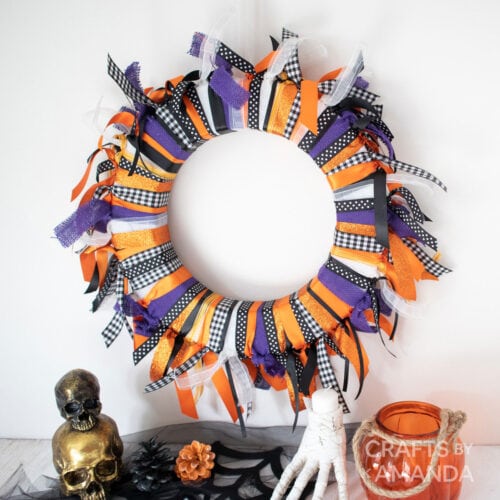
Create your own easy-to-make Halloween Ribbon Wreath using assorted ribbons in traditional holiday colors. A great addition to your Halloween decor.

Why we love this project
With so many beautiful ribbons, this ribbon wreath is just the kind of thing we love to hang on our front door for Halloween. It brings together all the colors we know and love for this festive holiday. Purples, blacks, oranges, and white. You can use a fun mixture of whatever ribbons you want to create this wreath!
Fortunately for us, we had a stash of ribbons we’d purchased over the years on-sale after the season was done. In fact, making this wreath has given us a whole new appreciation for ribbon!
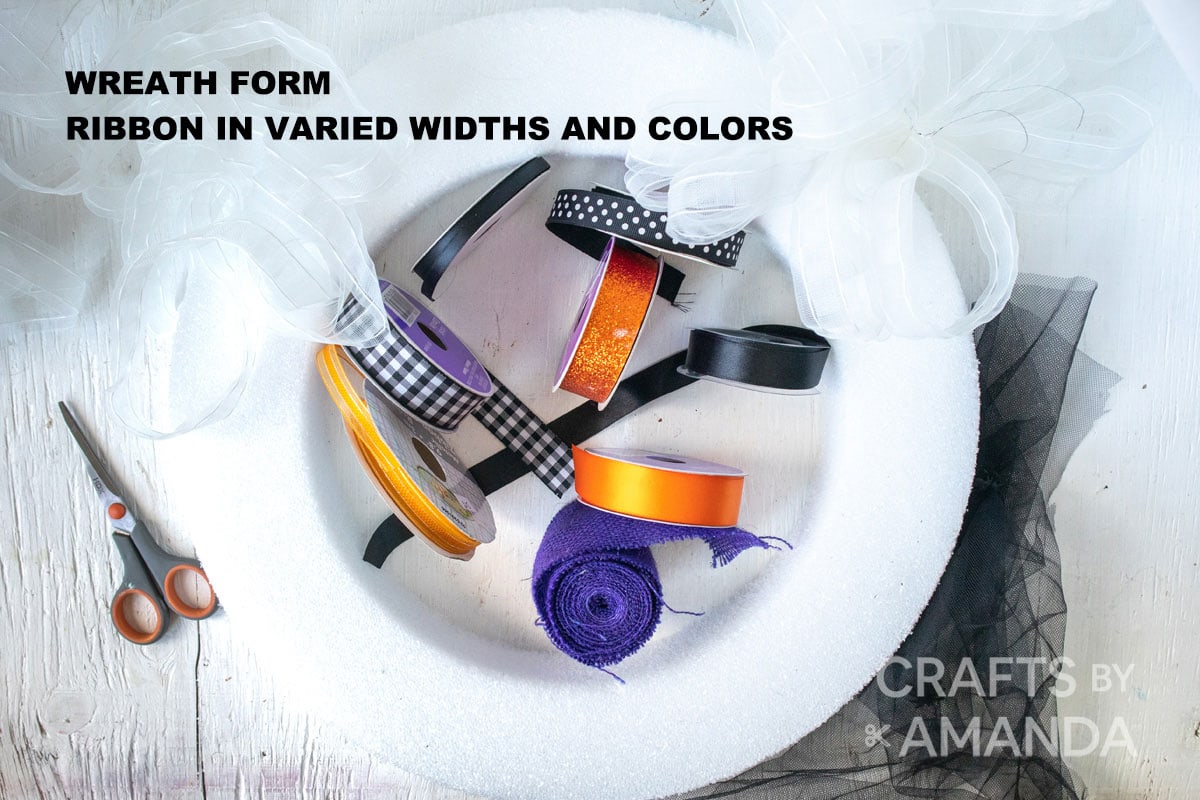
Supplies you will need
 Get full list of supplies and directions in the printable version at the end of this post.
How to Make a Halloween Ribbon Wreath
These step by step photos and instructions are here to help you visualize how to make this project. Please scroll down to simply print out the instructions!
- Place the styrofoam wreath form down on a flat surface. Determine the length you need to cut the strands by grabbing one ribbon and folding it around the wreath form. Add an extra 8”-10″ to have for the hanging ends.
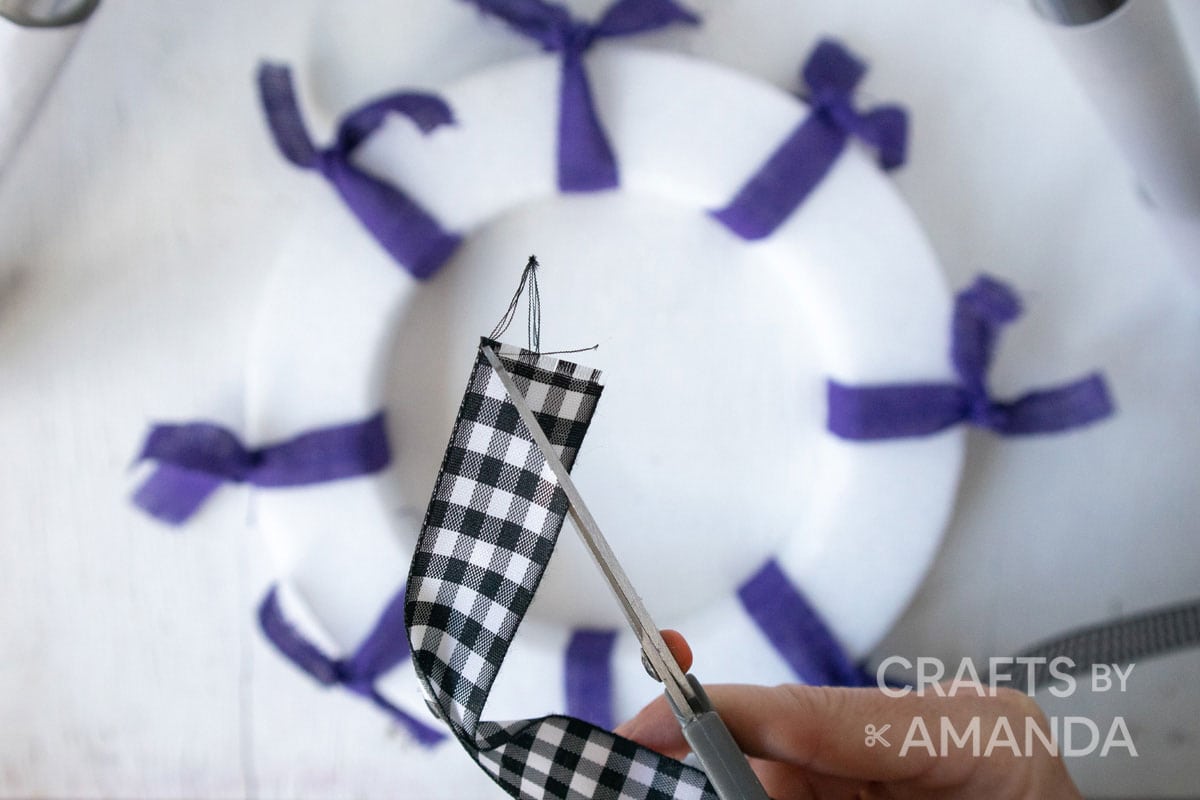
- Use this as the guide for cutting the other ribbon strands. Also, make sure to cut the ends on an angle to prevent the ribbon ends from fraying.
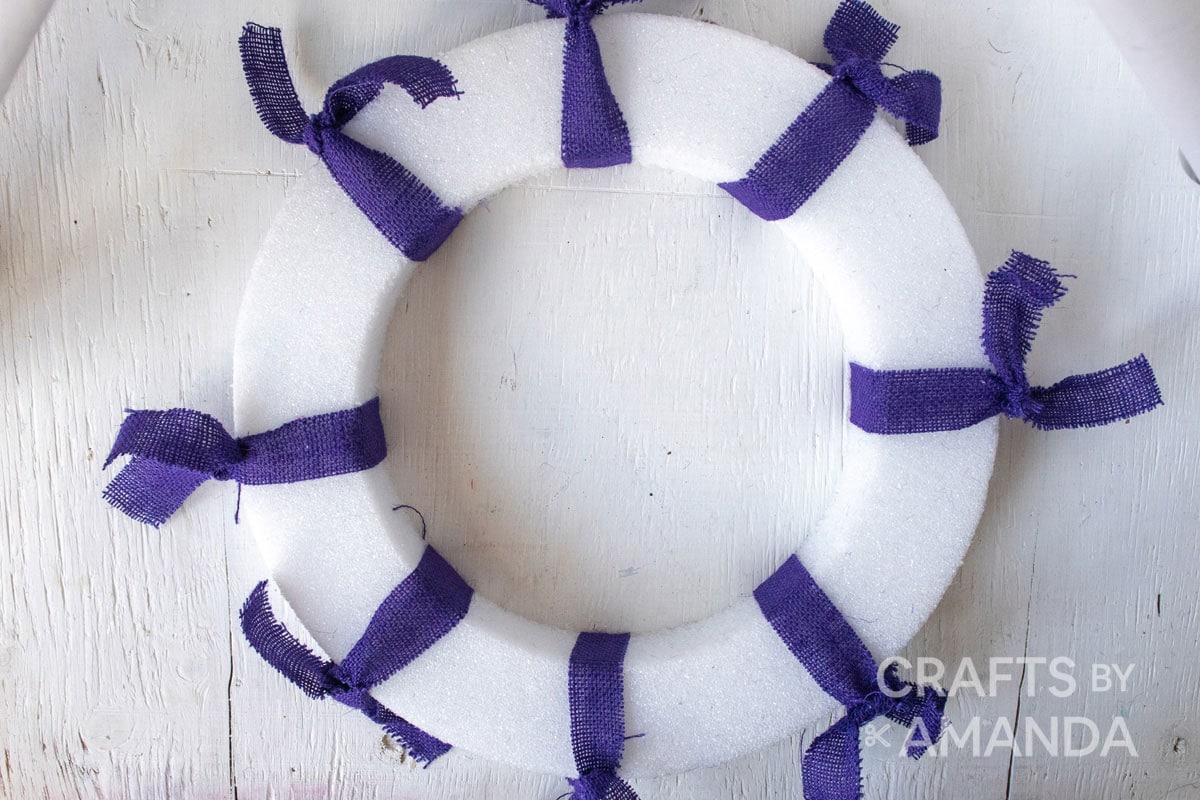
- Starting with the widest ribbon, wrap and tie one ribbon at a time around the form. Space the ribbon strands evenly apart around the form.
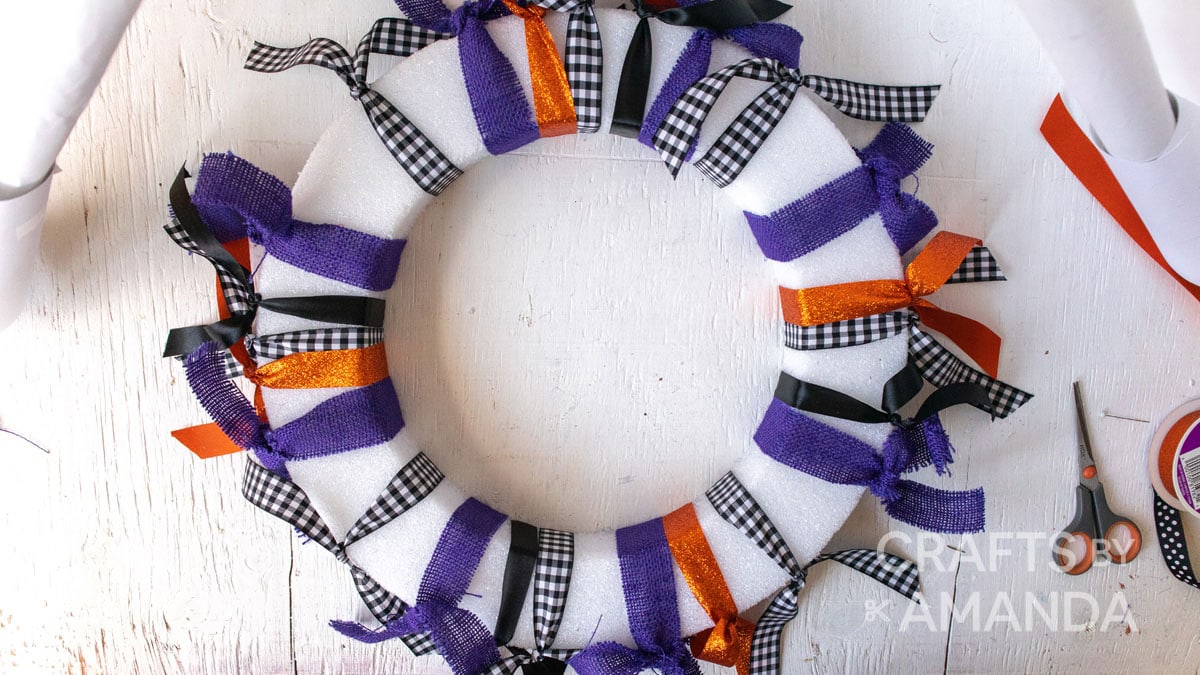
- Begin layering another ribbon onto the wreath form.
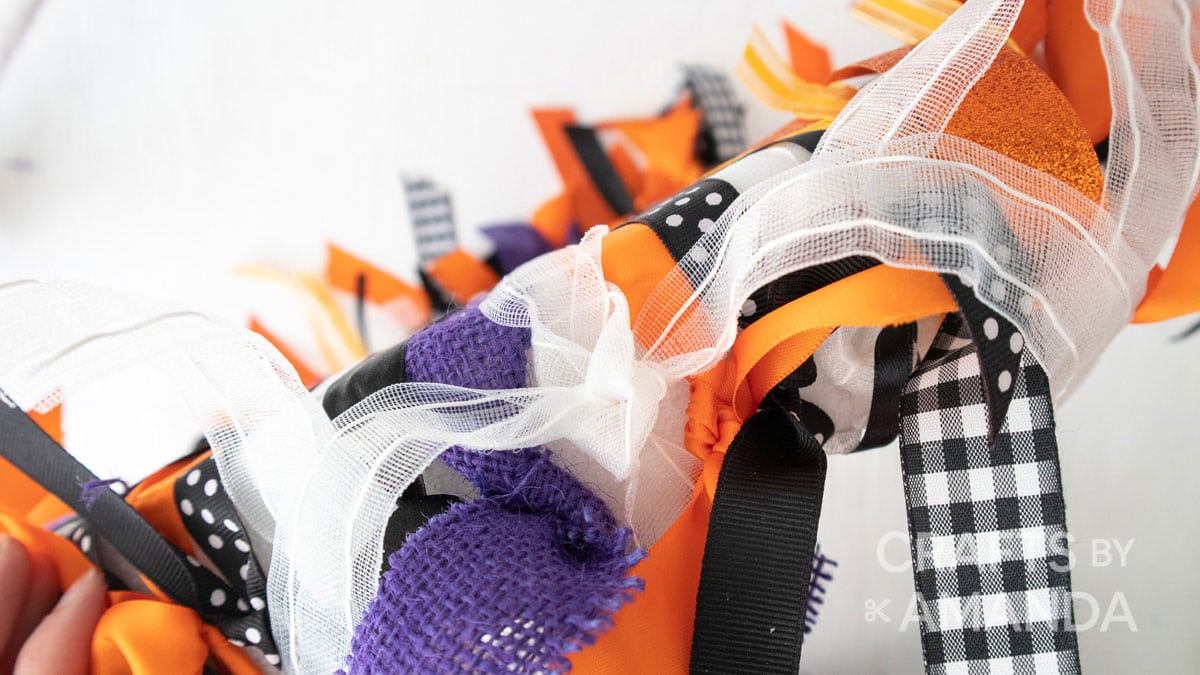
- Continue adding more ribbon around the wreath and overlapping with the previous ribbon layers to hide the styrofoam form underneath.
- Tie each ribbon with a double knot, placing the knot at the outer edge of the form.
Once all the form is no longer visible, the Halloween ribbon wreath is complete! Hang to enjoy.
Crafting Tips
- Regular priced ribbon is actually pretty pricey, especially when a lot of it is needed for a project. Check the clearance bin for ribbon the next time you’re shopping since you never know when inspiration will strike!
- This project is great for kids and would also make a fun craft night with friends.
- Look for ribbons in assorted widths, colors, and materials ranging from ¼” wide to 1 ¼” wide; primarily orange and black with some white and purple.
- Make sure to cut the ends on an angle to prevent the ribbon ends from fraying.

More Halloween Crafts
Looking for a simple pumpkin wreath to ring in fall AND Halloween with? We’ve got you covered with this Deco Mesh Pumpkin Wreath, a pretty Pumpkin Grapevine Wreath, and this adorable Burlap Pumpkin Wreath!
- Halloween Door – Keep Out
- Salt Dough Haunted Houses
- No-Sew Scrap Fabric Pumpkins
- Halloween Terrarium
- Pine Cone Flowers for Halloween
- Glowing Jack O Lantern Jars
- Clay Halloween Village
I love to create and share my projects with you! I know it’s hard to remember to come back and search, so I’ve made it easy for you with my weekly newsletter! You can subscribe for free and I’ll send you fun crafts every week right to your email.
Halloween Ribbon Wreath
Create an easy and beautiful Halloween Ribbon Wreath in traditional holiday colors with this simple tutorial!
Age Group: Adult Crafts
Project Type: Halloween
Supplies
- Styrofoam wreath form we used size 18”, but a 15" wreath form works great as well.
- Ribbon in assorted widths, colors, and materials from ¼” wide to 1 ¼” wide; primarily orange and black with some white and purple
Instructions
Cut the ribbon into strands long enough to wrap around the form and have about 4" of hanging ends.
Cut the ends of the strands on an angle.
Starting with the widest ribbon, wrap and tie one ribbon at a time around the form. Tie each ribbon with a double knot, placing the knot at the outer edge of the form.
Space the ribbon strands evenly apart around the form.
Begin layering another ribbon on to the wreath form.
Continue adding more ribbon around the wreath and overlap with the previous ribbon layers to hide the styrofoam form underneath.
Once all the form is no longer visible, the Halloween ribbon wreath is complete!
Expert Tips & FAQs
- Regular priced ribbon is actually pretty pricey, especially when a lot of it is needed for a project. Check the clearance bin for ribbon the next time you’re shopping since you never know when inspiration will strike!
- This project is great for kids and would also make a fun craft night with friends.
- Look for ribbons in assorted widths, colors, and materials ranging from ¼” wide to 1 ¼” wide; primarily orange and black with some white and purple.
- Make sure to cut the ends on an angle to prevent the ribbon ends from fraying.
This post originally appeared here on Sep 14, 2020.
Jane and Sonja are sisters, moms and lifelong craft addicts both living near Toronto, Canada with their families. They share their love of creativity, nature and coastal craft and DIY ideas on their blog Sustain My Craft Habit.
Latest posts by Jane and Sonja (see all)
Reader Interactions
Free CraftsBy email every week
Latest crafts straight to your inbox!


 English (US) ·