
.jpg)
 6 months ago
128
6 months ago
128
PROTECT YOUR DNA WITH QUANTUM TECHNOLOGY
Orgo-Life the new way to the future Advertising by AdpathwayAuthor by Ann Kollegger on December 19, 2025 Updated on December 19, 2025
With a few ingredients, you can whip up a whole lot of fun lip gloss flavors. Protect your lips while adding a little shine and tint, with this inexpensive, easy craft!
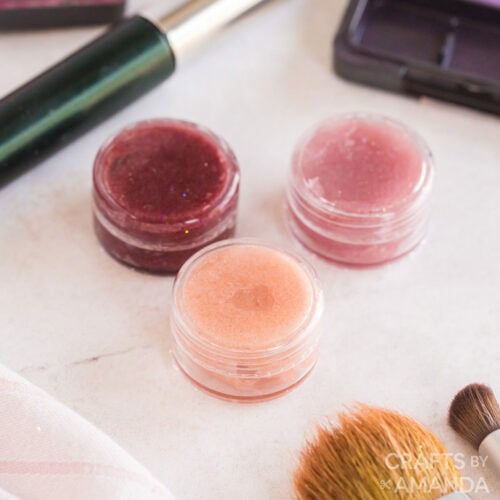
Lip gloss helps protect your lips as the colder weather approaches, all while adding a pop of color and shine. Learn how to make lip gloss at home! It’s the perfect combination of an easy recipe and inexpensive ingredients.

Why This Project Works
With a few ingredients, you can whip up a whole lot of fun lip gloss flavors. We used tropical punch, watermelon, cherry, and orange, but there are lots of flavors and combinations you can create!
Petroleum jelly forms a natural barrier against moisture. It has been used since its discovery in 1859 to prevent skin from chapping, making it a perfect base for lip gloss. If you’re making this as a gift, see how to make lip scrub as well!

These lip glosses are packed into mini airtight containers, making them perfect for gift giving! Kids and adults alike will love how easy this project is to make.
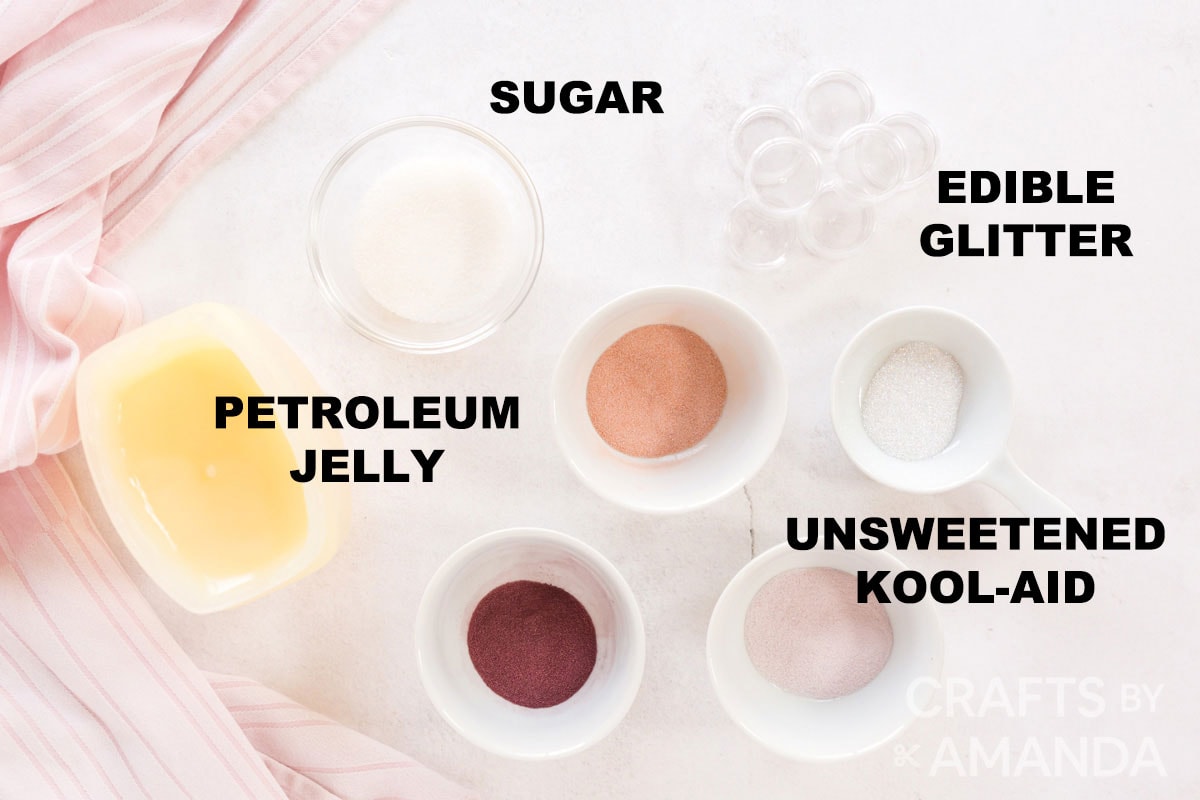
Craft supplies you will need:
 Get full list of supplies and directions in the printable version at the end of this post.
Craft information:
- Age Level: 8 and up
- Mess Factor: Medium
- Time to Complete: 30 minutes
- Cost estimate: 80 cents each
How to Make Lip Gloss
These step by step photos and instructions are here to help you visualize how to make this project. Please scroll down to simply print out the instructions!
This recipe makes 6 containers, each holding 1 tablespoon of lip gloss. You will have plenty of supplies left over to make more!
- Wash your hands with soap and water. Make sure all your spoons and bowls are clean and dry.
- Measure 1/2 cup petroleum jelly into a microwave-safe bowl.
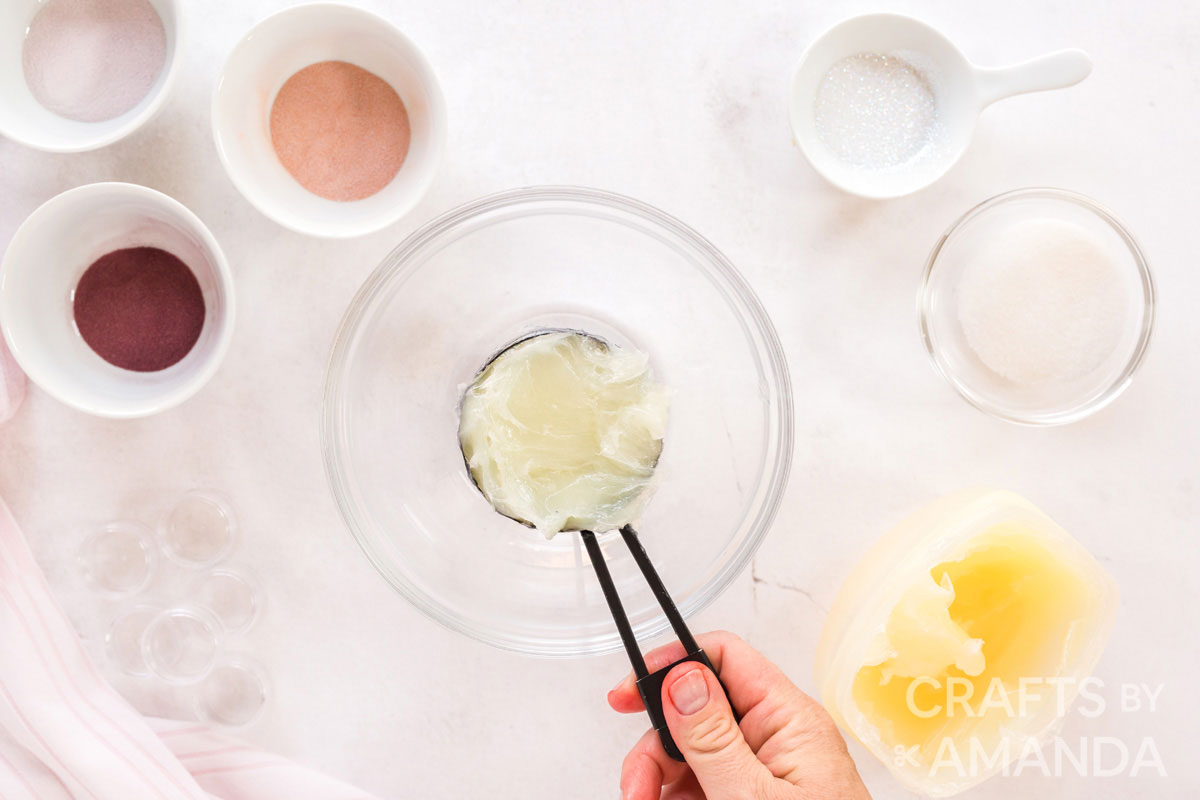
- Microwave jelly until just about melted. Keep an eye on it – we did 1-minute increments and it took about 2-minutes. Use the hot pads to carefully take the bowl out of microwave as it will be HOT. Place bowl on a hot pad on your work surface.
- Stir melted petroleum jelly until it is well combined.
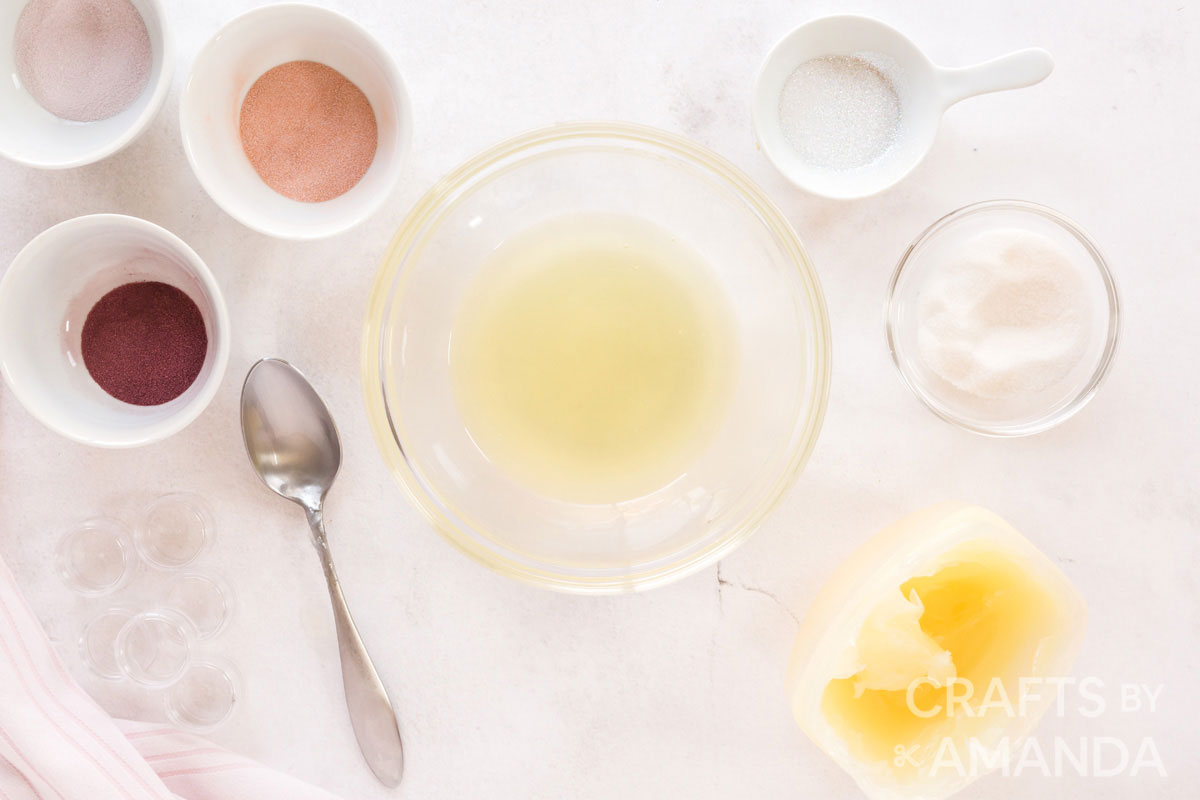
- Divide the jelly into the remaining 4 bowls.
- Sprinkle 1/2 teaspoon of Kool-Aid powder into each bowl.
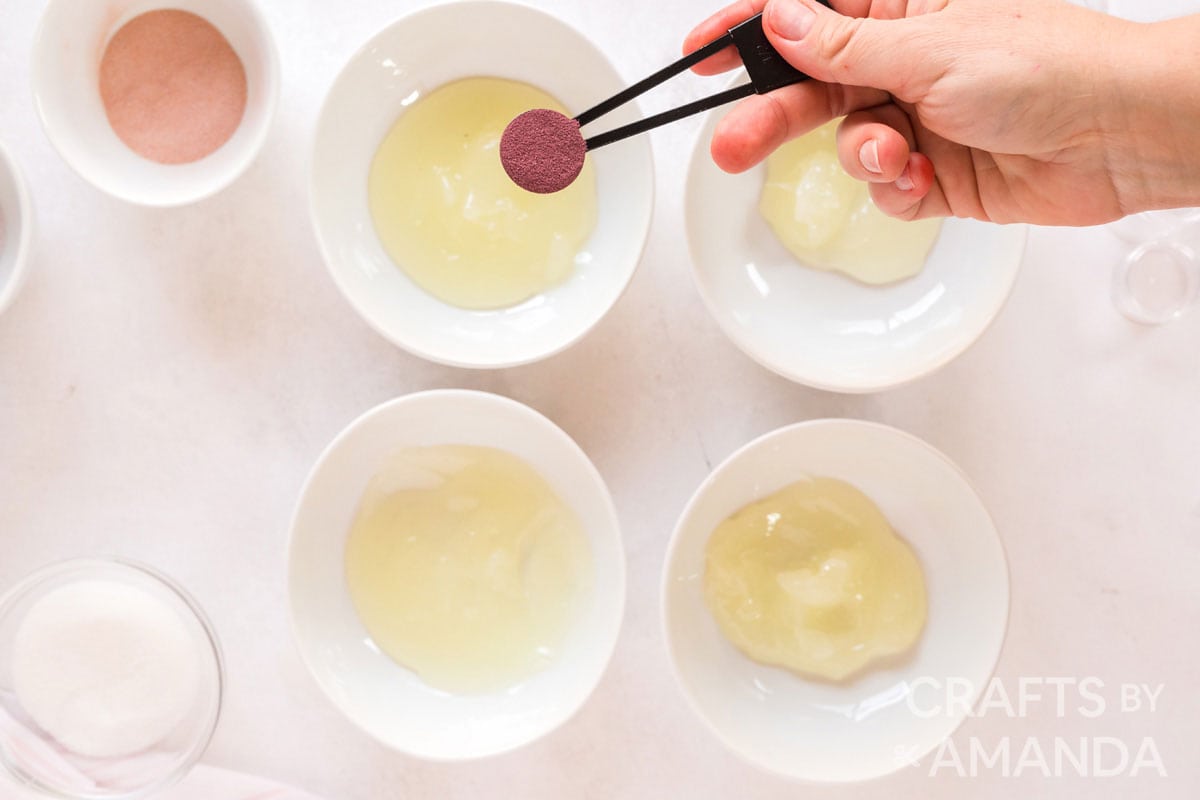
- Add a pinch of sugar to each bowl.
HINT: To make your lip gloss shimmer, add about a teaspoon of edible glitter (in the color of your choice). The finished lip gloss will have a little texture and shimmer due to the glitter!
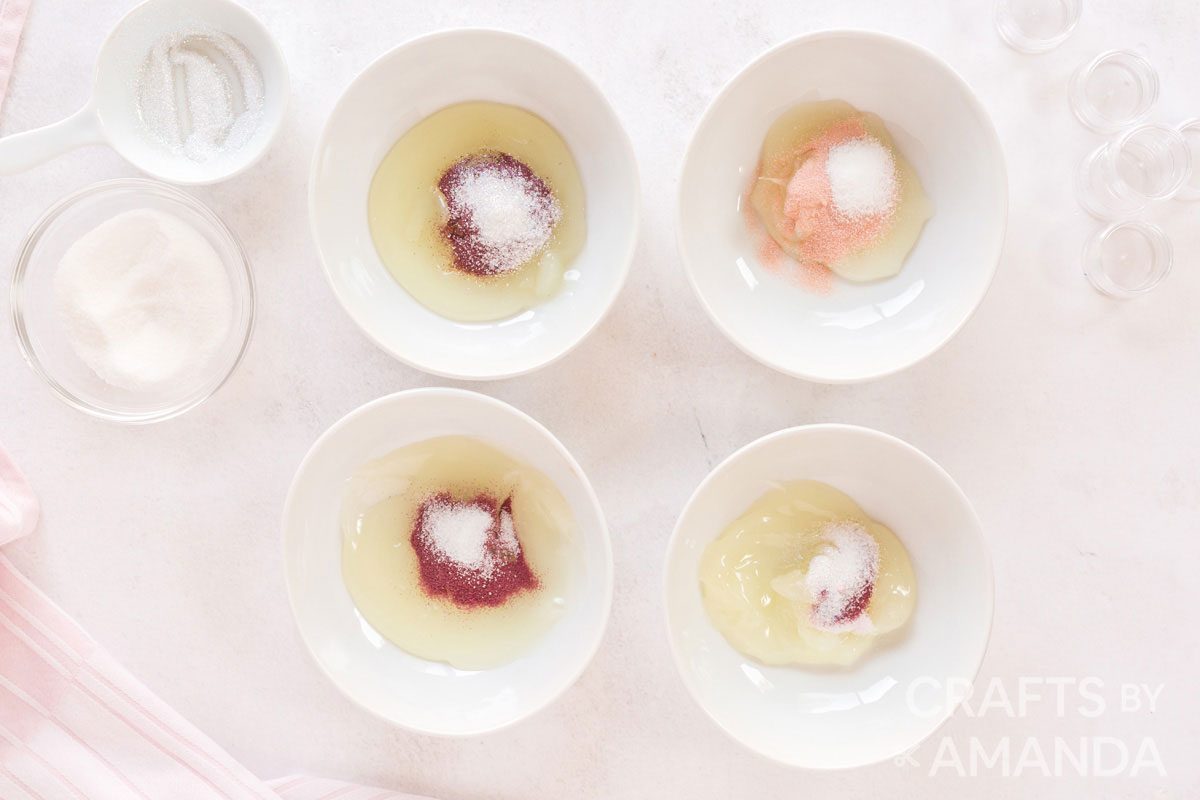
- Use a clean spoon to stir mixture together in each bowl.
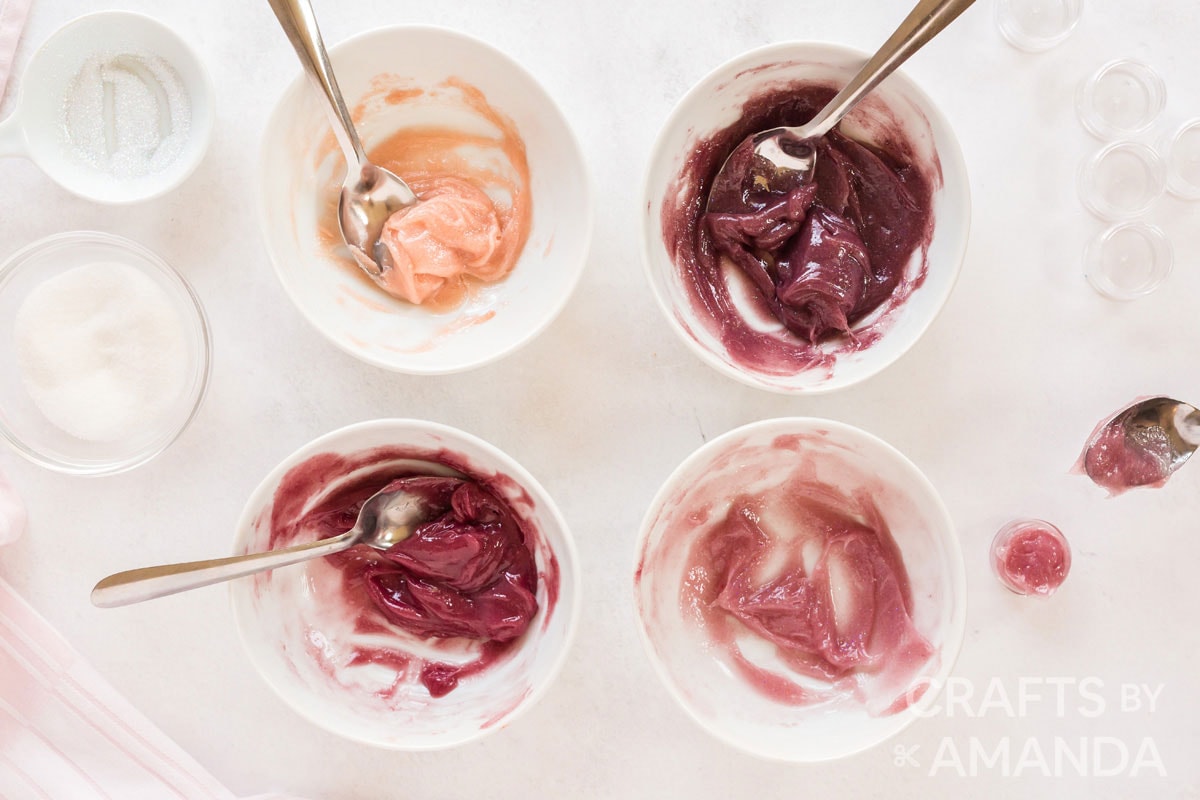
- Scoop 1 flavor mixture in each mini container.
- Tap the container on your work surface to remove air bubbles then put the lid on.

Expert Crafting Tips:
- Use finished lip gloss for up to 3 months.
- For a fun twist, layer 2 different flavors in a container!
- If you prefer, you can use solid coconut oil instead of petroleum jelly.
- Use caution when handling the bowl of melted petroleum jelly – it is hot!

Protect your lips while adding a little shine and tint, with this inexpensive, easy craft! Spend an afternoon making lip gloss and bath bombs to create spa gift sets for the holidays!
More Bath & Body Craft Projects
- Lavender Sugar Scrub
- Orange Bath Salts
- Easy Herbal Sachets
- How to Make Lip Scrub
- How to Make Lavender Soap
- Lavender Bath Bombs
I love to create and share my projects with you! I know it’s hard to remember to come back and search, so I’ve made it easy for you with my weekly newsletter! You can subscribe for free and I’ll send you fun crafts every week right to your email.
How to Make Lip Gloss
With a few ingredients, you can whip up a whole lot of fun lip gloss flavors. Protect your lips while adding a little shine and tint, with this inexpensive, easy craft!
Crafting Time30 minutes
0 minutes
Total Time30 minutes
Age Group: Kids Crafts
Project Type: Crafts
Makes: 6 containers
Supplies
- Petroleum Jelly a new unopened container
- unsweetened Kool-Aid packets in various flavors (we used dark cherry, tropical punch, watermelon, and orange)
- Granulated sugar
- Edible glitter or edible glitter gel Optional
Craft tools
Small microwave safe bowl
Ramekins
Spoons
Hot pads
Measuring cups and spoons
Paper Towels
Lip gloss containers
Instructions
Wash your hands with soap and water. Make sure all your spoons and bowls are clean and dry.
Measure 1/2 cup petroleum jelly into a microwave safe bowl.
Microwave jelly until just about melted. Keep an eye on it – we did 1 minute increments and it took about 2 minutes. Use the hot pads to carefully take the bowl out of microwave as it will be HOT. Place bowl on a hot pad on your work surface.
Stir melted petroleum jelly until it is well combined. Divide the jelly into the remaining 4 bowls.
Sprinkle a 1/2 teaspoon of Kool-Aid flavor into each bowl.
Add a pinch of sugar to each bowl. To make your lip gloss shimmer, add about a teaspoon of the edible glitter gel (in the color of your choice, optional). The finished lip gloss will have a little texture and shimmer due to the glitter!
Use a clean spoon to stir mixture together in each bowl.
Scoop 1 flavor mixture into each container. Tap container on your work surface to remove air bubbles and then put the lid on.
Expert Tips & FAQs
- Use finished lip gloss for up to 3 months.
- For a fun twist, layer 2 different flavors in a container!
- If you prefer, can use coconut oil instead of petroleum jelly.
- Use caution when handling the bowl of melted petroleum jelly – it is hot!
Ann Pianta Kollegger has designed craft products, greeting cards and other products which have been sold nationwide. Her most valuable creative moments have been with her own kids and with the patients she worked with at a local children’s hospital.
Latest posts by Ann Kollegger (see all)
About Ann Kollegger
Ann Pianta Kollegger has designed craft products, greeting cards and other products which have been sold nationwide. Her most valuable creative moments have been with her own kids and with the patients she worked with at a local children’s hospital.
Reader Interactions
Free CraftsBy email every week
Latest crafts straight to your inbox!


 English (US) ·