
.jpg)
 11 months ago
68
11 months ago
68
PROTECT YOUR DNA WITH QUANTUM TECHNOLOGY
Orgo-Life the new way to the future Advertising by AdpathwayAuthor by Amanda Davis on July 11, 2025 Updated on July 11, 2025
Making a wind chime out of recycled materials is a fun project for kids and adults. Using colorful plastic lids that can't go in the recycle bin is a great way to keep them out of the landfill.
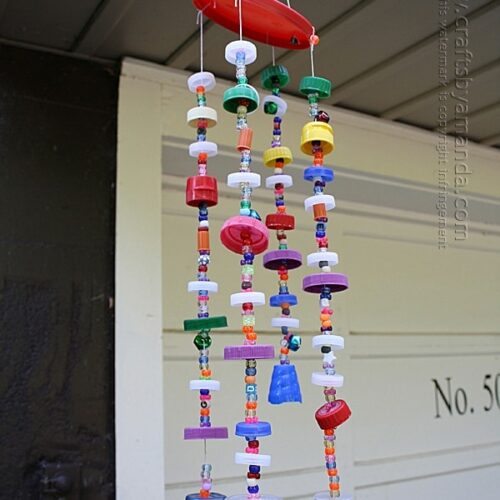
This recycled plastic lid windchime is made from a colorful assortment of used lids. A great upcycled craft that helps keep some non-recyclables out of the landfill!

Recycled Plastic Lid Wind Chime
I have been saving plastic lids for a while now. It’s amazing how fast they accumulate when you start collecting them. I’ve saved a few here and there and made a few plastic lid crafts, but this plastic lid windchime was different.
These are things that we would normally throw away or toss into the recycle bin (although I’ve heard that many of these lids can’t be recycled). Once I started saving them, I was shocked at just how quickly they added up!
After making this recycled lid wind chime, start collecting your buttons and make my rainbow button wind chime too!

Supplies you need to make this recycled windchime
I’ve included the different types of plastic lids I used as well as the other pieces to complete the project.

How to Make a Plastic Lid Windchime
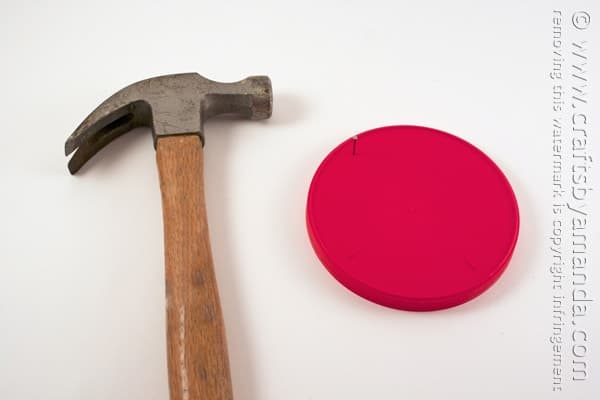
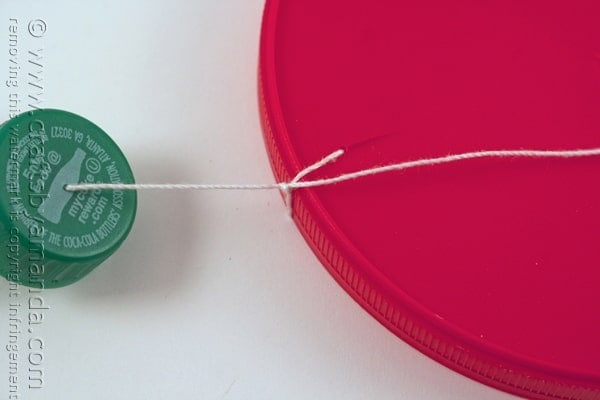
- Use the hammer and nail to make four holes (like a plus sign) in the large lid. Set the lid aside.

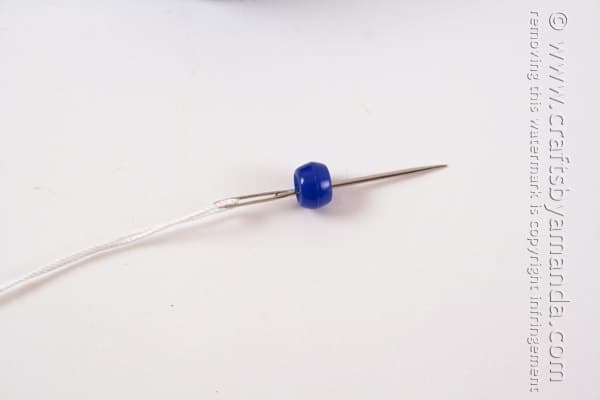
- Thread needle with a piece of string. The amount of string you use is up to you, it just depends on how long you want your chimes to be!
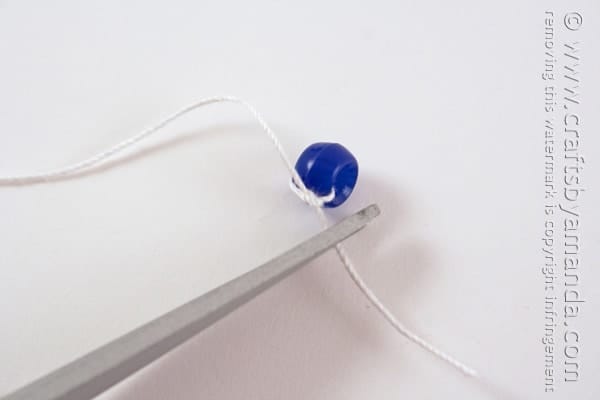
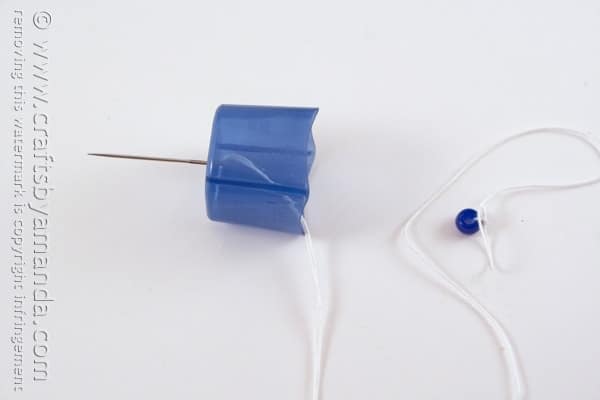
- Thread the needle through one bead. Tie a few knots around that bead at the end of the string.
- Poke the needle through center of the inside of a deep plastic lid, like a cough medicine cup.
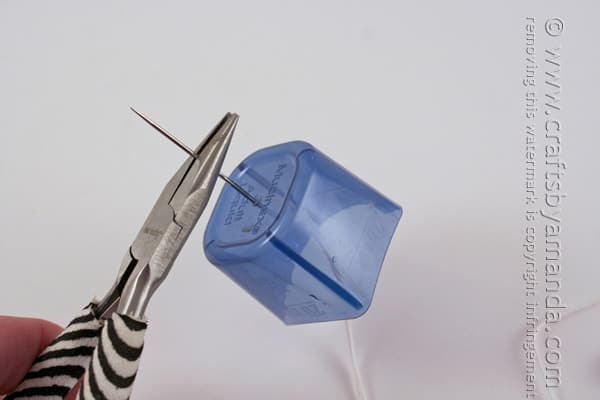
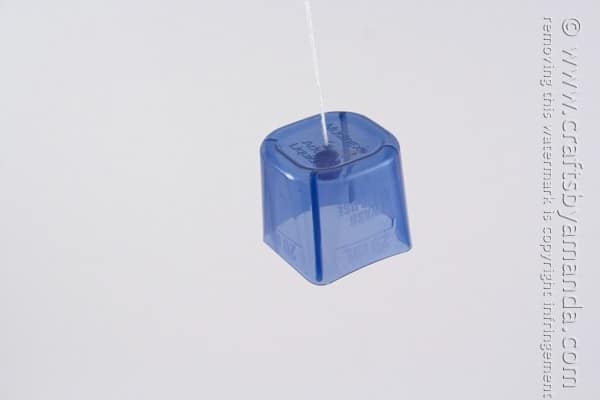
- Pull the needle through, pushing the plastic lid all the way to the end, touching the bead. If you have trouble pulling the needle through, use flat nose pliers. Don’t grab the needle at the eye, it’s weaker there and the pliers will break it. As you can see, it hangs like a bell :)
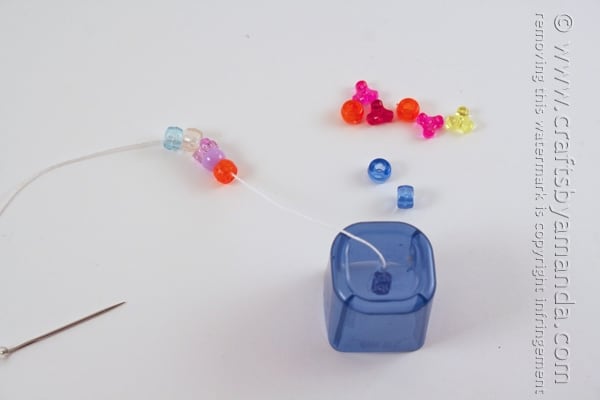
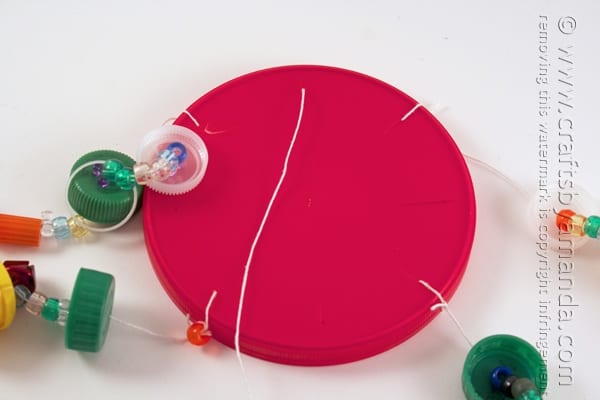
- Add several beads to the string and push them to the end.
- Add another plastic lid, pushing it to the end.
- Continue with the above steps until you have reached the length you like.
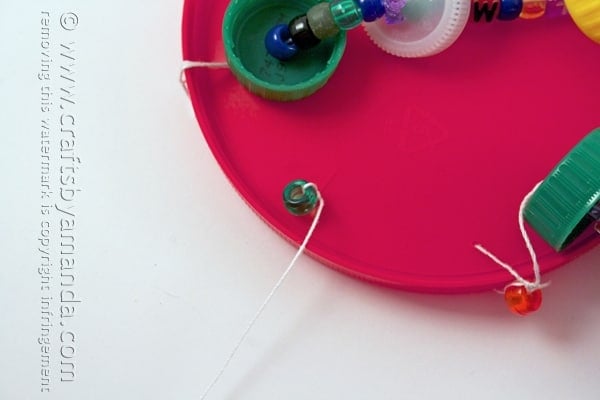
- Poke the needle through one of the holes you made in the large lid in step 1.
- Tie a knot a few times and trim off the excess string. Repeat these steps three more times for the remaining chime strings.


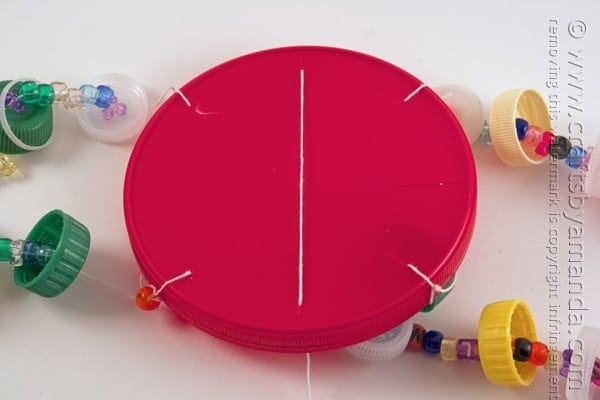
To Make the Hanger
- Use a hammer and nail to poke two more holes in the large lid, across from each other.
- Thread a needle with string and tie a bead to the end. Poke it through one of the new holes in the large lid and pull it through the top. The bead will stop it from coming out the other side.
- Poke the needle back down through the second hole and pull it snug. Pull the string out as long as you want the hanger to be.
- To keep the hanger at that length, turn the lid over and tie a bead to that string to keep it in place. Trim any excess string.

This recycled plastic lid windchime was a lot of fun to make, and I hope you like it too. Mine is hanging outside, and the lids will fade from exposure to the sun. It’s still a great way to recycle!
More Recycled Crafts
- Bottlecap Horse
- Bracelets from Recycled T Shirts
- Wine Cork Succulent Magnets
- Colored Denim Scrap Wreath
Recycled Plastic Lid Windchime
Making a wind chime out of recycled materials is a fun project for kids and adults. Using colorful plastic lids that can't go in the recycle bin is a great way to keep them out of the landfill.
Crafting Time2 hours
Total Time2 hours
Makes: 1 wind chime
Supplies
- 1 large sturdy lid
- Lots of plastic lids water bottles, milk jugs, soda bottles, etc
- A few cup type lids from medicine bottles, lids from hair mousse, whipped cream, etc
- Colorful pony beads
- Jingle bells
- String
- Tools: thimble flat nose pliers, hammer, nail, needle
Instructions
Use the hammer and nail to make four holes (like a plus sign) in the large lid. Set the lid aside.
Thread needle with a piece of string. The amount of string you use is up to you, it just depends on how long you want your chimes to be!
Thread the needle through one bead. Tie a few knots around that bead at the end of the string.
Poke the needle through center of the inside of a plastic lid.* Pull the needle through, pushing the plastic lid all the way to the end, touching the bead.
Add several beads and an occasional jingle bell to the string and push them to the end.
Add another plastic lid, pushing it to the end.
Continue with steps 5 and 6 until you have reached the length you like.
Poke the needle through one of the holes you made in the large lid in step 1.
Tie a knot a few times and trim off the excess string.
Repeat steps 2-9 three more times.
To make the hanger, use a hammer and nail to poke two more holes in the large lid, across from each other.
Thread a needle with string and tie a bead to the end. Poke it through one of the new holes in the large lid and pull it through the top. The bead will stop it from coming out the other side.
Poke the needle back down through the second hole and pull it snug. Pull the string out as long as you want the hanger to be.
To keep the hanger at that length, turn the lid over and tie a bead to that string to keep it in place. Trim any excess string.
Expert Tips & FAQs
If you have trouble pulling the needle through the lid, especially the “eye” part of the needle because it is thicker, use a pair of flat nose pliers to help pull it through. A thimble can be helpful in pushing a stubborn needle through as well!
You may be able to thread the string through everything without the needle all together, depending on the size of the hole you make in the lids.
This post originally appeared here on June 27, 2014.
Amanda Davis is the crafty, entrepreneurial mother of four children. She loves to bake, cook, make kid's crafts and create decorative items for her home. She is a crafting expert and guru in the kitchen and has appeared online and in print publications many times over the years.
Latest posts by Amanda Davis (see all)
Reader Interactions
Free CraftsBy email every week
Latest crafts straight to your inbox!


 English (US) ·